tabby & codeQL分析含依赖JAR包 tabby tabby有一个很大的优点,就是可以直接分析jar包,而codeql是用源代码去编译分析。虽然分析深度不如codeql,但是平时ctf都是拿到一个jar包去分析,用tabby就很方便。所以还是非常值得学习的!
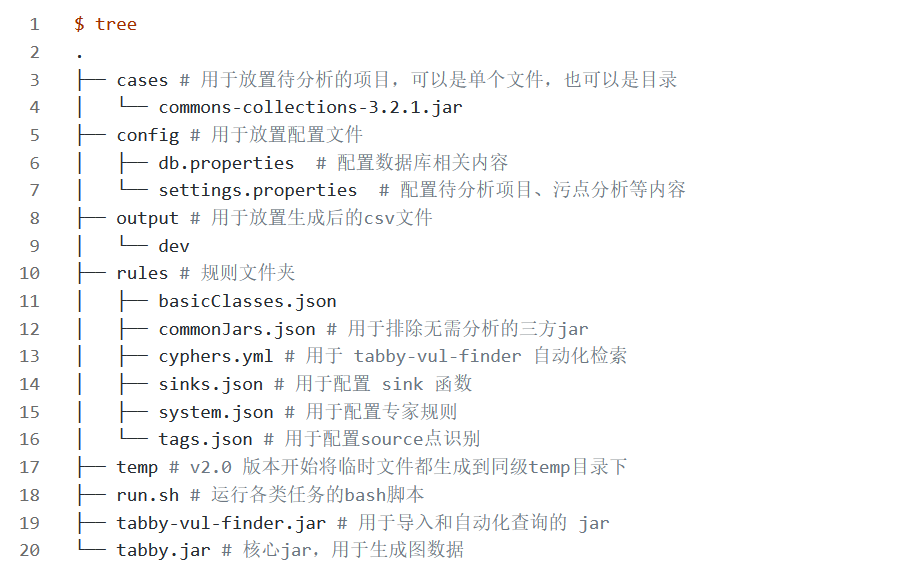
官方下载的tabby文件目录结构,非常重要,就是用这个db.properties和neo4j联系起来的:
环境搭建 按照官方文档安装https://www.yuque.com/wh1t3p1g/tp0c1t/rmm0aimycci76ysm#
或者这个也很清楚:https://clowsman.github.io/2024/12/01/Tabby%E4%BD%BF%E7%94%A8%E5%AD%A6%E4%B9%A0/index.html
下载tabby:
https://github.com/wh1t3p1g/tabby/releases/download/v2.0.0/tabby.zip
Tabby 共有两个配置文件:
config/db.properties:用于图数据库的相关配置config/settings.properties:用于代码分析的相关配置
默认没有db.properties,在config目录下新建db.properties:
1 2 3 4 5 6 7 tabby.cache.isDockerImportPath = false tabby.neo4j.username = neo4j tabby.neo4j.password = password tabby.neo4j.url = bolt://127.0.0.1:7687
重要参数 介绍一下settings.properties的参数:
1 2 3 4 5 6 7 8 tabby.build.target = cases/java-sec-code-1.0.0.jar tabby.build.libraries = libs tabby.build.mode = web tabby.output.directory = ./output/dev tabby.build.rules.directory = ./rules tabby.build.thread.size = max
tabby.build.target: 待分析的文件名或文件夹
tabby.build.libraries:部分需要增加的常见依赖目录,比如 javax.servlet-3.0.0.v201103241009.jar
tabby.build.mode:分析模式,gadget模式会分析所有遍历到的文件;web模式会根据common-jars.json文件剔除部分常见依赖后进行分析。
tabby.output.directory: 代码属性图csv文件输出的目录
tabby.build.rules.directory:tabby的规则目录
tabby.build.thread.size:分析所需的线程数,数值类型,默认为max,根据机器性能自动选择数量
其余参数基本不需要修改,尝试不同的场景时搭配组合即可。
指定 jdk 依赖用于分析 1 2 3 4 tabby.build.useSettingJRE = false tabby.build.isJRE9Module = false tabby.build.javaHome = /Library/Java/JavaVirtualMachines/zulu-8.jdk/Contents/Home
自 1.3.0 版本开始运行环境变成了 JDK 17,也就意味着默认情况下,分析项目时用到的JDK依赖都是17版本。
为了能方便改变分析时依赖的JDK版本,上述规则可以用来配置指定的JDK版本
默认情况下,tabby.build.useSettingJRE为false,使用当前运行Jar的JDK版本。如无特殊需求,可以保持该配置为false。
当需要指定特定 JDK 版本时,tabby.build.useSettingJRE改为true。
同时配置好tabby.build.javaHome,并根据指定的JDK版本是否大于9,来配置tabby.build.isJRE9Module。
对于tabby.build.useSettingJRE为true的情况,第一次运行时会将目标javaHome下的jdk依赖都复制到jre_libs目录,这个过程会花费一些时间,请耐心等待。后续的运行将会直接载入jre_libs目录下的JDK作为分析的依赖。
注意:如果修改了tabby.build.javaHome内容,则需要同时删除jre_libs目录,不然修改将不会生效。
配置 jdk 依赖是否参与分析 1 2 3 4 tabby.build.isJDKProcess = false # 分析过程是否加入基础的2个jdk依赖 tabby.build.withAllJDK = false # 分析过程是否加入全量的jdk依赖 tabby.build.isJDKOnly = false # 分析过程是否仅分析jdk依赖,不会去分析target目录下的文件
上述配置用于配置分析过程中是否需要将JDK依赖一起进行分析。
tabby.build.isJDKProcess=true时,将会加入几个JDK的基础依赖一起分析。
tabby.build.withAllJDK=true时,将会加入所有的JDK依赖一起分析。
tabby.build.isJDKOnly=true时,将只分析所有JDK依赖,前面配置的target将不会被分析。
配置是否分析所有函数 1 tabby.build.analysis.everything = true
正常情况下,对于静态函数调用且入参为空的情况,该函数的分析结果不会影响当前函数的分析,所以此类函数的分析是可以被忽略的。但可能也存在需要此类函数的情况,为此,参数tabby.build.analysis.everything将被用于开启或关闭对上述类型函数的分析。当设置为true时,将分析所有的函数,反之,则忽略上述函数的情况。不过设置为true的情况,会增加分析的时间。在使用时,可根据自己的情况来设置。
特殊的分析场景 (beta) 1 tabby.build.onDemandDrive = false
在分析Web项目的时候,有个痛点就是分析了很多无用的函数,大部分函数并不能从endpoint入口访问到。
为此,为了能进一步提升分析速度,开放了tabby.build.onDemandDrive按需分析的模式。
当配置为true时,将仅从source函数开始进行分析(source的定义见tags.json文件)。非source函数所经过的函数将不会被分析,极大地提升分析速度。
实例 比如我要分析我的my-yso项目,我需要如下操作
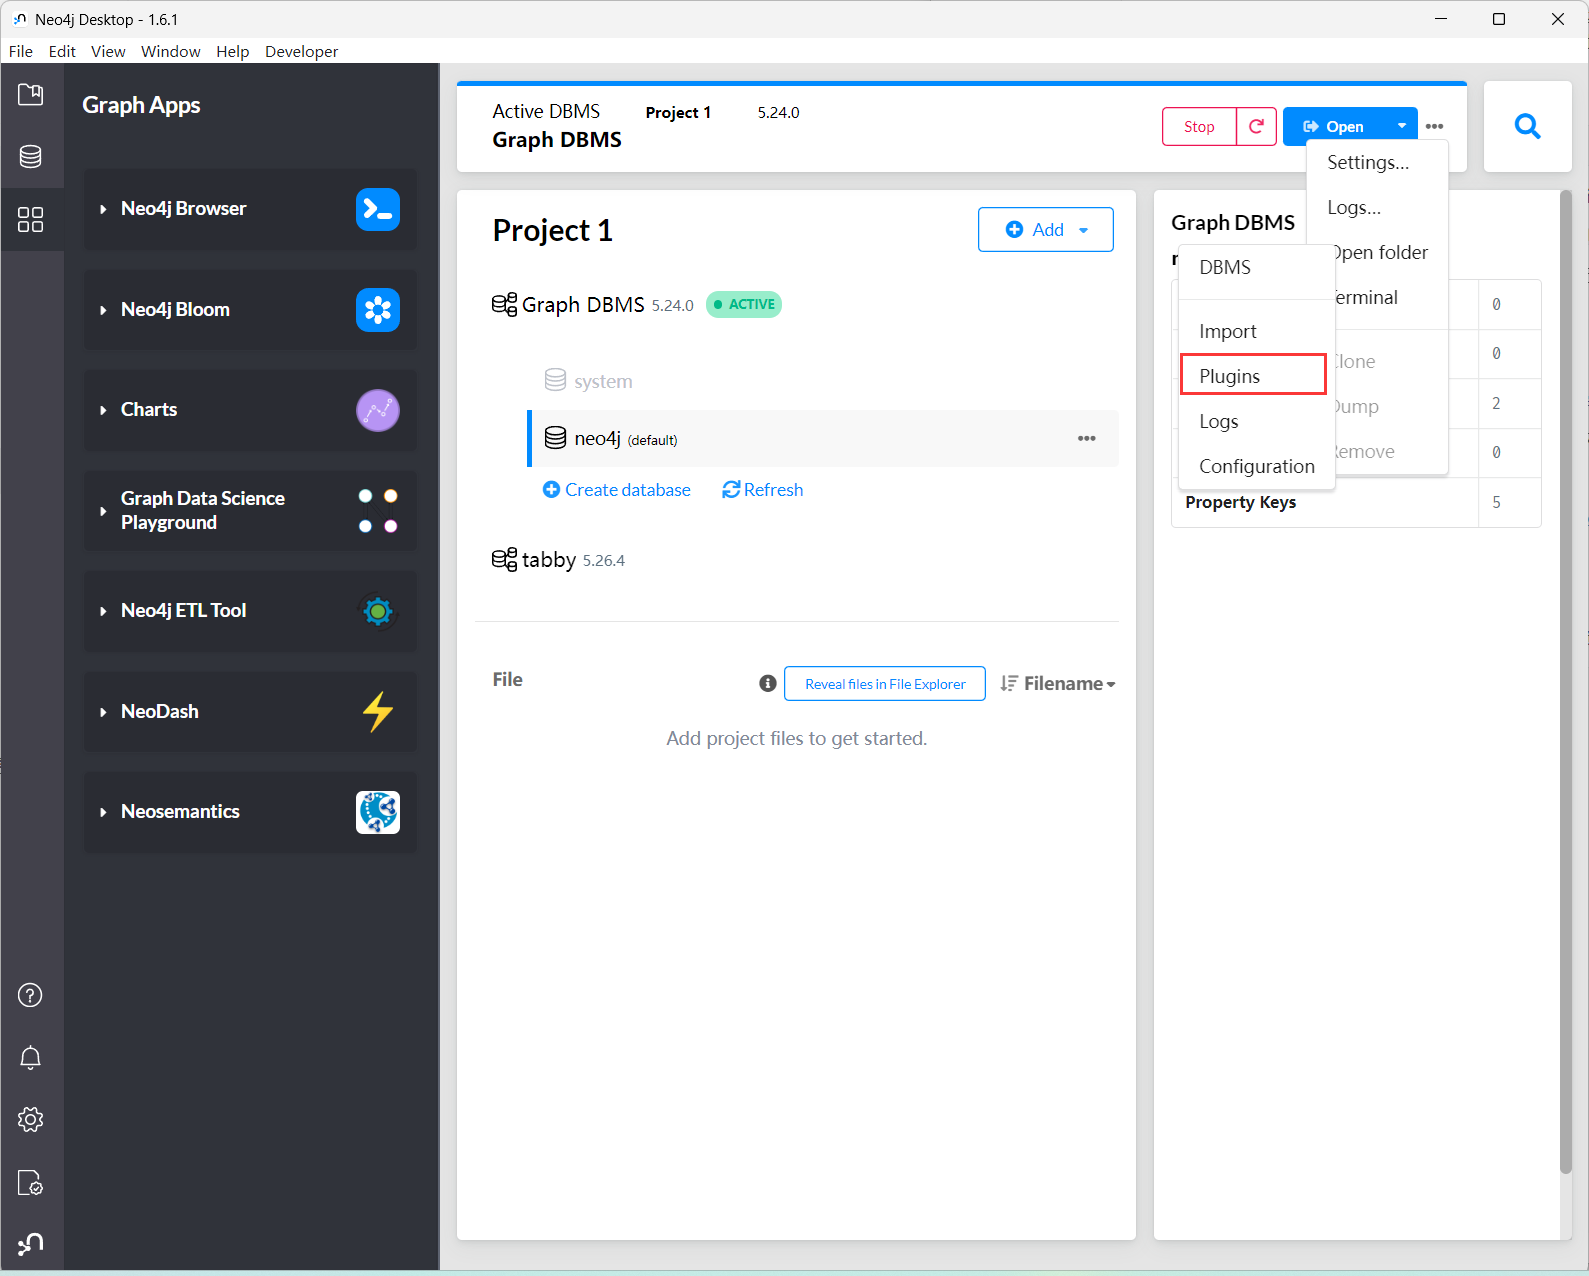
下载apoc-core,apoc-entended,tabby-path-finder,将其放到Plugins目录下
https://github.com/neo4j/apoc
https://github.com/neo4j-contrib/neo4j-apoc-procedures
https://github.com/wh1t3p1g/tabby-path-finder
看官网文档修改neo4j配置https://www.yuque.com/wh1t3p1g/tp0c1t/wx6fiha89p0wu6s5#
先把my-yso编译打包为jar,如果需要分析依赖,需要打包成fatJAR,springboot自带或者用maven-assembly-plugin都可以。
1 2 3 4 5 6 7 8 9 10 11 12 13 14 15 16 17 18 19 20 21 22 23 24 25 26 <plugin > <groupId > org.apache.maven.plugins</groupId > <artifactId > maven-assembly-plugin</artifactId > <version > 3.6.0</version > <configuration > <descriptorRefs > <descriptorRef > jar-with-dependencies</descriptorRef > </descriptorRefs > <archive > <manifest > <addClasspath > true</addClasspath > </manifest > </archive > </configuration > <executions > <execution > <phase > package</phase > <goals > <goal > single</goal > </goals > </execution > </executions > </plugin >
修改tabby下的setting.properties如下,运行tabby.jar,需要以jdk17运行,指定tabby.build.javaHome以jdk8编译代码
1 2 3 4 5 6 7 8 9 10 11 12 13 14 15 16 17 18 19 20 21 22 23 24 25 26 27 28 29 30 31 32 33 34 35 36 37 38 39 40 41 42 43 44 45 46 tabby.build.target = cases/SSTIVuln-0.0.1-SNAPSHOT.jar tabby.build.libraries = libs tabby.build.mode = gadget tabby.output.directory = ./output/dev tabby.build.rules.directory = ./rules tabby.build.thread.size = max tabby.build.useSettingJRE = true tabby.build.isJRE9Module = false tabby.build.javaHome = D:\\jdk-all\\jdk_8u_381 tabby.debug.details = false tabby.debug.print.current.methods = true tabby.build.isJDKProcess = true tabby.build.withAllJDK = true tabby.build.isJDKOnly = false tabby.build.checkFatJar = true tabby.build.removeNotPollutedCallSite = true tabby.build.interProcedural = true tabby.build.onDemandDrive = false tabby.build.isPrimTypeNeedToCreate = false tabby.build.thread.timeout = 2 tabby.build.method.timeout = 5 tabby.build.isNeedToCreateIgnoreList = false tabby.build.isNeedToDealNewAddedMethod = true tabby.build.timeout.forceStop = false tabby.build.isNeedToProcessXml = true
用tabby-vul-finder导入生成的csv文件到neo4j
https://github.com/wh1t3p1g/tabby-vul-finder
随便找了个有XStream依赖的项目做测试:
tabby的学习:https://xz.aliyun.com/news/12679?time__1311=eqUxu7Dti%3DEx07DlZmPD%3DIk4YuSROi0OoD&u_atoken=c1dec9debf4acf0058122c22df4d4228&u_asig=1a0c381017434825452321418e0034
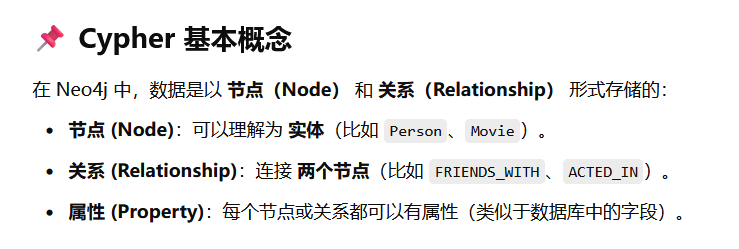
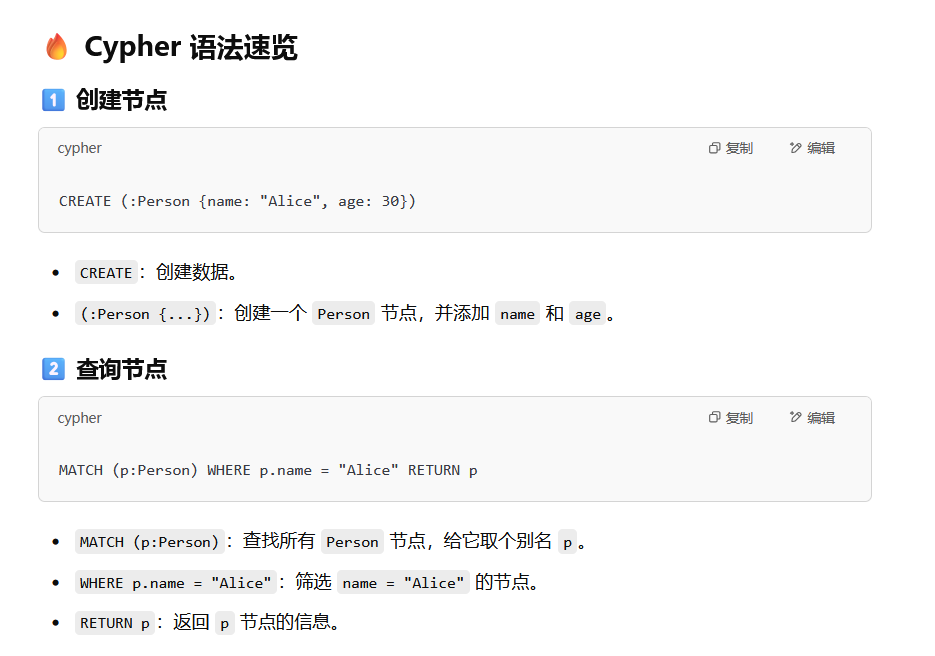
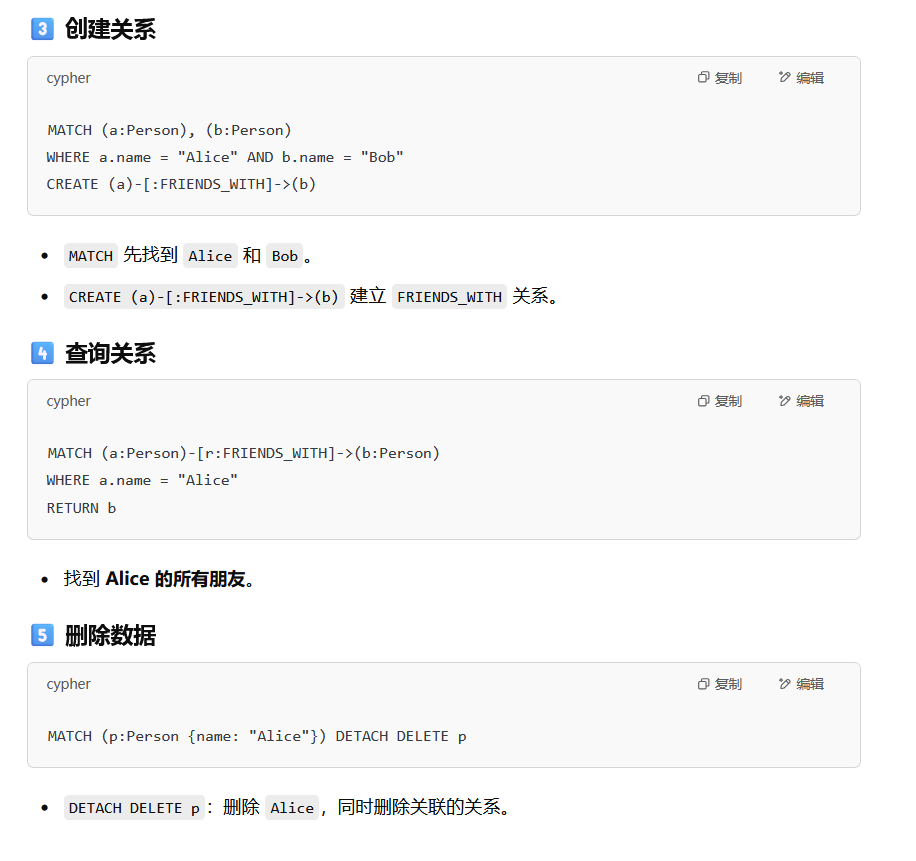
语法 简单介绍一下neo4j的cypher语法
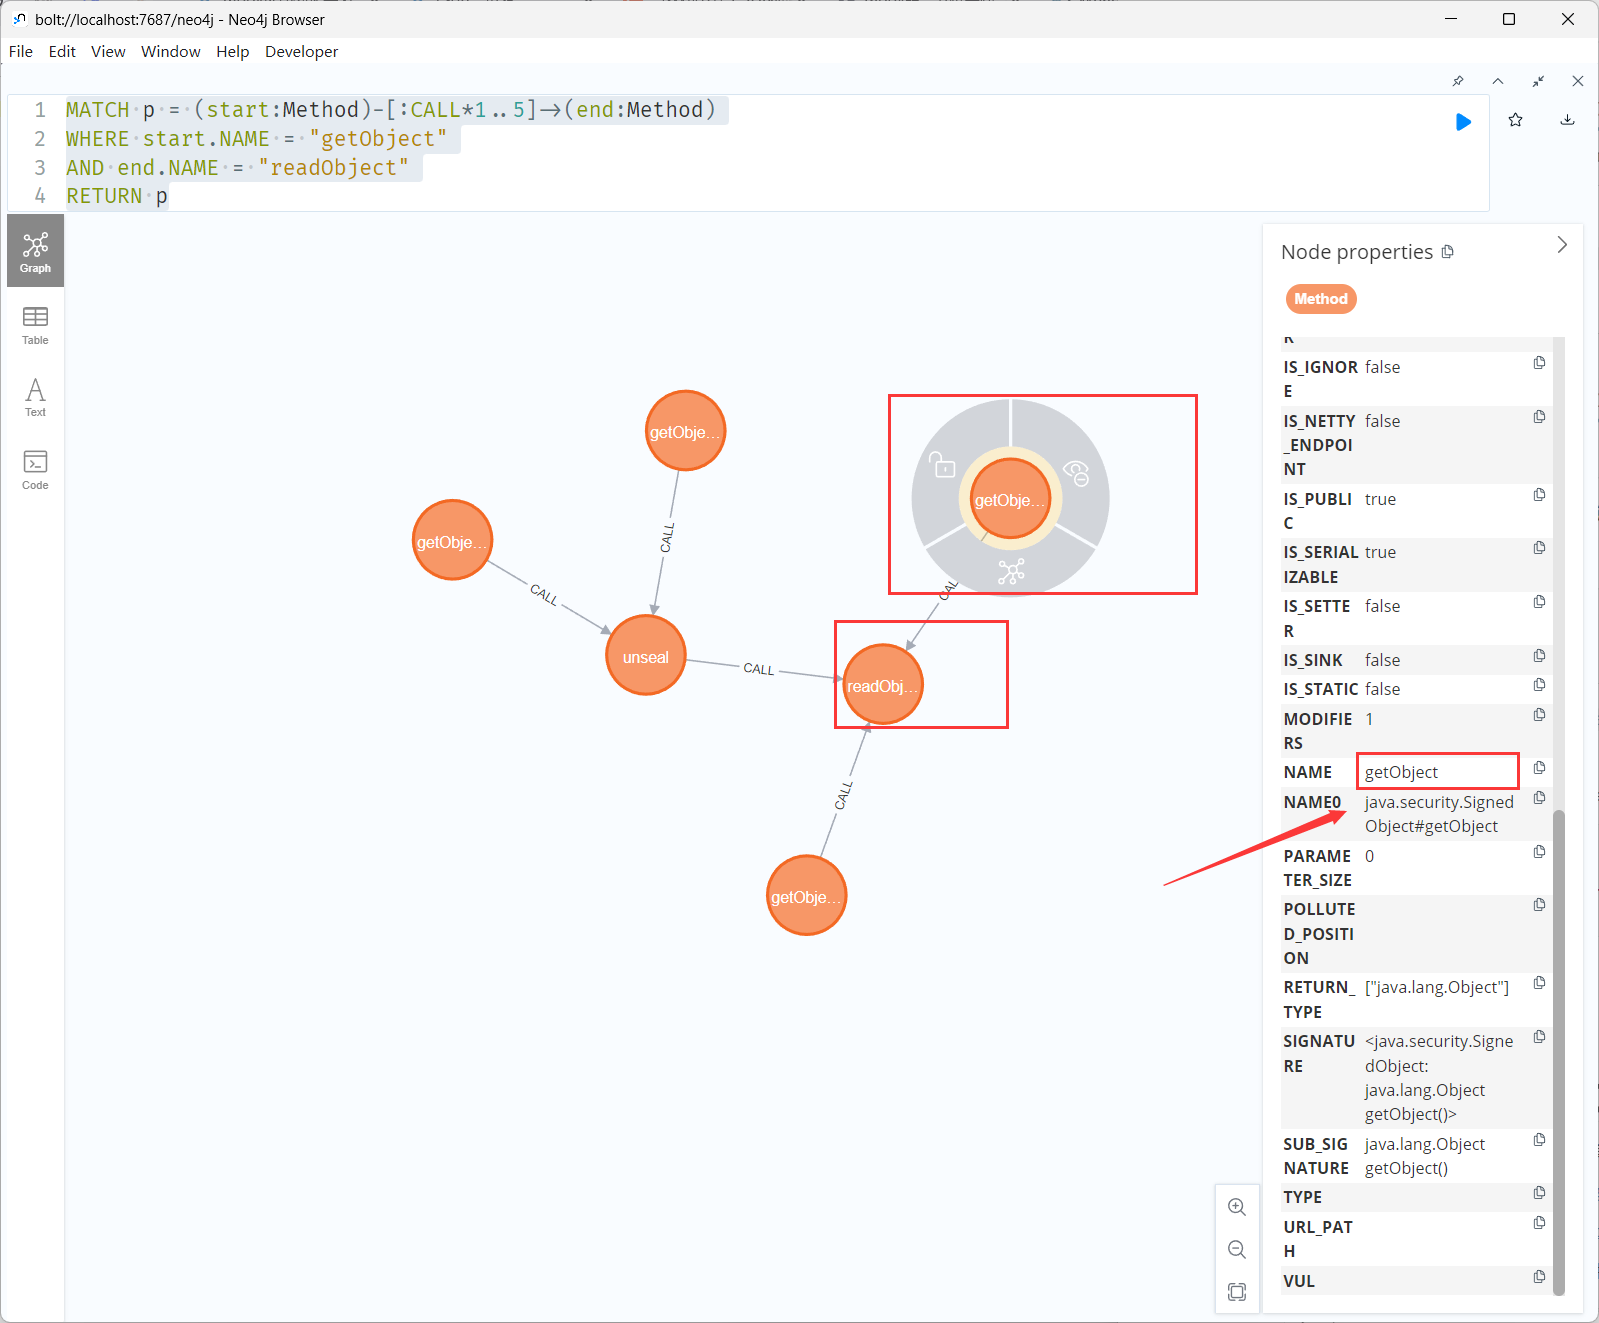
比如我要找signedObject二次反序列化的链子,[:CALL*1..5]表示层数为5:
1 2 3 4 MATCH p = (start:Method)-[:CALL*1..5]->(end:Method) WHERE start.NAME = "getObject" AND end.NAME = "readObject" RETURN p
直接随便选个节点根据右边的Node properties进行筛选,即可找到SignedObject#getObject
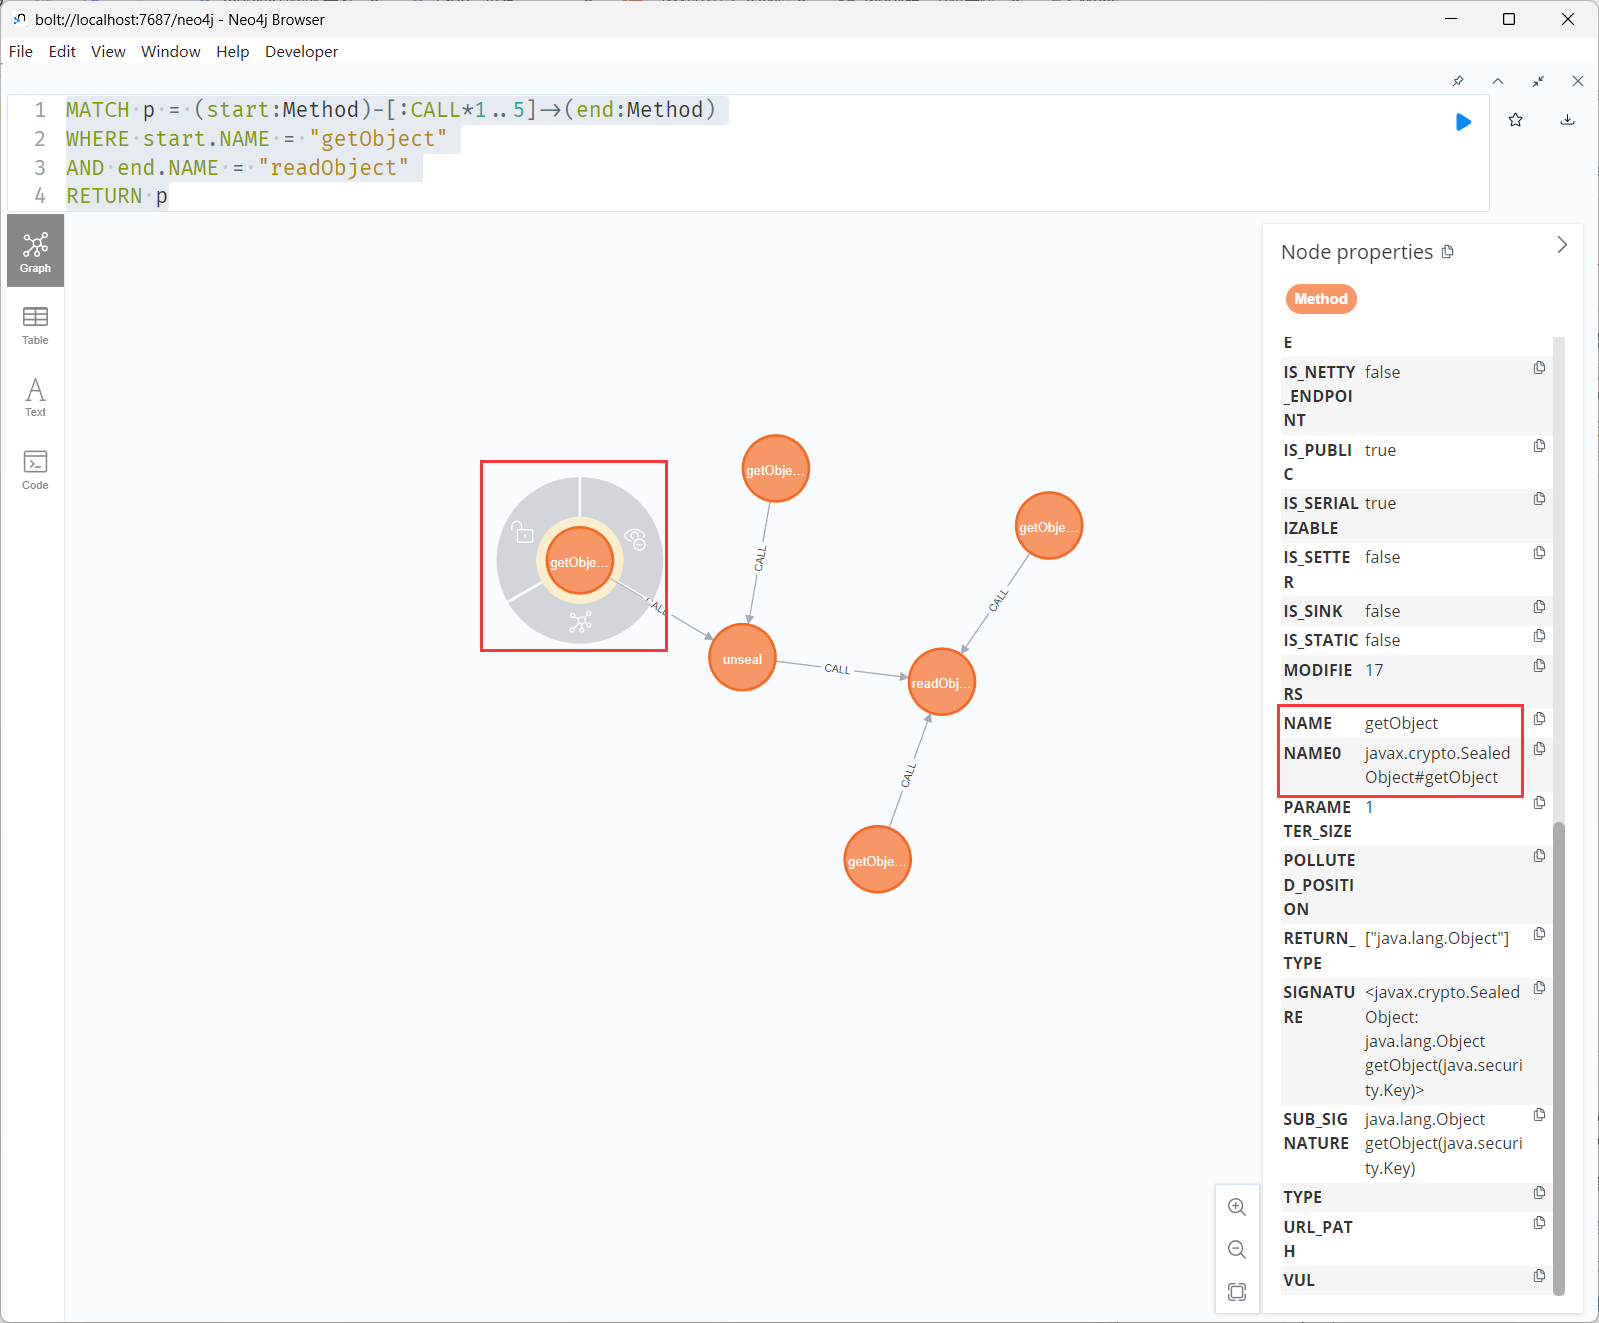
另外还找到SealedObject也能触发
分析了一下代码,发现这是个还原加密对象的方法,需要传Cipher参数,一般来说能调用getter的地方都不能传参数,比如fastjson jackson。
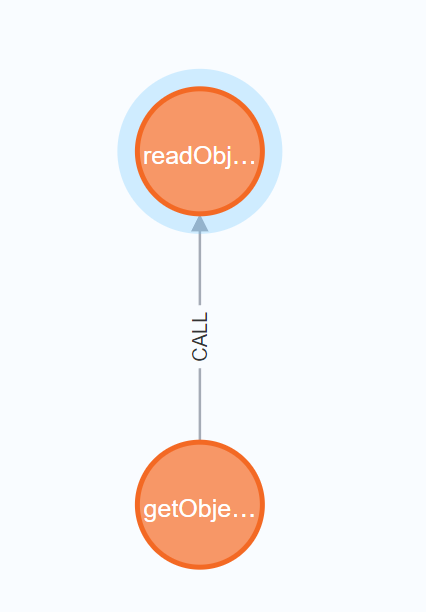
所以我们加个筛选条件,getObject为无参函数:
1 2 3 4 5 MATCH p = (start:Method)-[:CALL*1..5]->(end:Method) WHERE start.NAME = "getObject" AND end.NAME = "readObject" AND start.HAS_PARAMETERS = false RETURN p
属性集合:
Method的属性
1 2 3 4 5 6 7 8 9 10 11 12 13 14 15 16 17 18 19 20 21 22 23 24 25 26 27 28 29 30 "properties": { "IS_FROM_ABSTRACT_CLASS": false, "IS_SOURCE": false, "POLLUTED_POSITION": "[]", "IS_ABSTRACT": false, "SIGNATURE": "<fe.document.pof.action.DocTree: void doUploadBrithdayCard(javax.servlet.http.HttpServletRequest,javax.servlet.http.HttpServletResponse)>", "IS_ACTION_CONTAINS_SWAP": false, "IS_GETTER": false, "IS_ENDPOINT": false, "HAS_PARAMETERS": true, "IS_IGNORE": false, "MODIFIERS": 1, "HAS_DEFAULT_CONSTRUCTOR": true, "IS_PUBLIC": true, "ID": "86caf40594c7880f54857f557940c64d", "IS_NETTY_ENDPOINT": false, "IS_SINK": false, "PARAMETER_SIZE": 2, "RETURN_TYPE": "void", "VUL": "", "NAME0": "fe.document.pof.action.DocTree.doUploadBrithdayCard", "CLASSNAME": "fe.document.pof.action.DocTree", "NAME": "doUploadBrithdayCard", "IS_CONTAINS_SOURCE": false, "IS_STATIC": false, "IS_CONTAINS_OUT_OF_MEM_OPTIONS": false, "SUB_SIGNATURE": "void doUploadBrithdayCard(javax.servlet.http.HttpServletRequest,javax.servlet.http.HttpServletResponse)", "IS_SERIALIZABLE": false, "IS_SETTER": false }
Class属性
1 2 3 4 5 6 7 8 9 10 11 12 13 "properties": { "HAS_INTERFACES": false, "IS_STRUTS_ACTION": false, "HAS_SUPER_CLASS": true, "HAS_DEFAULT_CONSTRUCTOR": true, "INTERFACES": "[]", "IS_INTERFACE": false, "ID": "d8e1d3c444eee94312797846cdf9fec2", "IS_ABSTRACT": false, "IS_SERIALIZABLE": false, "SUPER_CLASS": "com.sun.xml.internal.bind.v2.runtime.output.Pcdata", "NAME": "com.sun.xml.internal.bind.v2.runtime.unmarshaller.Base64Data" }
Relationship类型
1 2 3 4 5 ALIAS CALL EXTENDS HAS INTERFACE
codeql学习 用的字节的IDA,trae美滋滋。
安装codeql:https://github.com/github/codeql-cli-binaries/releases/tag/v2.20.7
SDK:https://github.com/github/codeql/tags
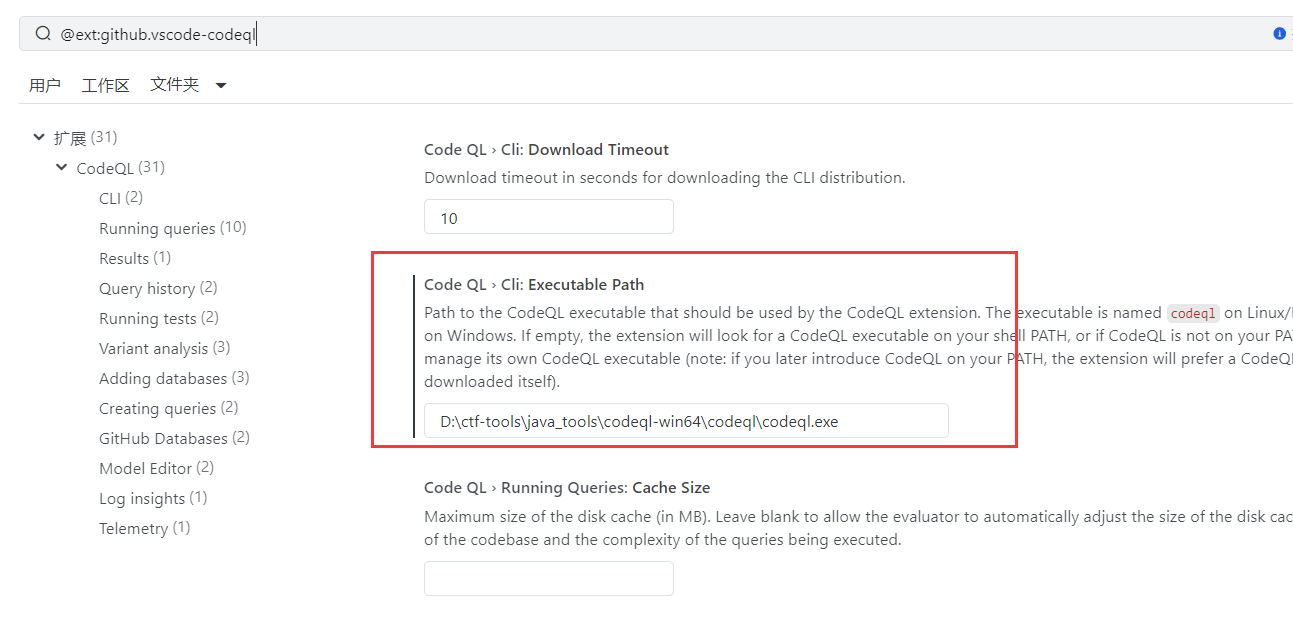
配置IDA的codeQL插件 Executable Path
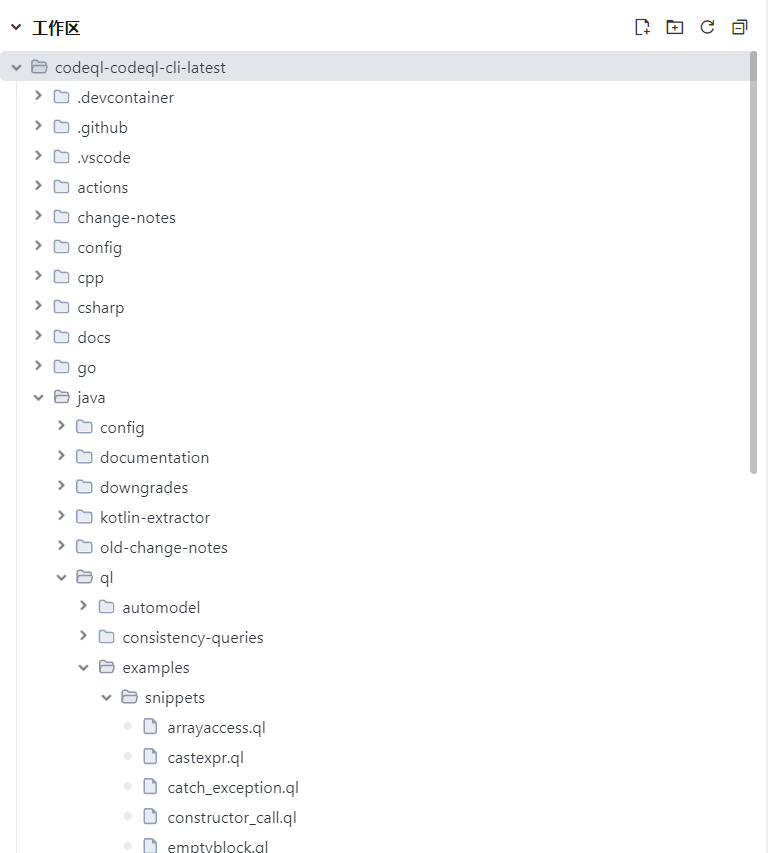
将SDK导入IDA
网上很多教程到这里就开始分析数据库了,分析出的数据库没依赖源码怎么办?
codeql只能分析源码,不能识别pom
所以使用codeql想要分析pom依赖的话,需要先把项目打包成fatJAR,然后全部反编译
工具 https://github.com/webraybtl/CodeQLpy
非spring项目打包成fatJAR:
1 2 3 4 5 6 7 8 9 10 11 12 13 14 15 16 17 18 19 20 21 22 23 24 25 26 <plugin > <groupId > org.apache.maven.plugins</groupId > <artifactId > maven-assembly-plugin</artifactId > <version > 3.6.0</version > <configuration > <descriptorRefs > <descriptorRef > jar-with-dependencies</descriptorRef > </descriptorRefs > <archive > <manifest > <addClasspath > true</addClasspath > </manifest > </archive > </configuration > <executions > <execution > <phase > package</phase > <goals > <goal > single</goal > </goals > </execution > </executions > </plugin >
spring项目可以打包成shade模式:
1 2 3 4 5 6 7 8 9 10 11 12 13 <plugin > <groupId > org.apache.maven.plugins</groupId > <artifactId > maven-shade-plugin</artifactId > <version > 3.4.1</version > <executions > <execution > <phase > package</phase > <goals > <goal > shade</goal > </goals > </execution > </executions > </plugin >
在用CodeQLpy时,发现会报如下org.apache.commons.fileupload.FileItemFactory cannot be resolved.错误
1
2
3
4
5
6
7
[2025-04-01 20:17:43] [build-stderr] ---------- [2025-04-01 20:17:43] [build-stderr] 1. ERROR in D:\PyCharm\Project-all\CodeQLpy\out\decode\classes\org\springframework\boot\autoconfigure\web\ErrorProperties.java (at line 0) [2025-04-01 20:17:43] [build-stderr] package org.springframework.boot.autoconfigure.web; [2025-04-01 20:17:43] [build-stderr] ^ [2025-04-01 20:17:43] [build-stderr] The type org.apache.commons.fileupload.FileItemFactory cannot be resolved. It is indirectly referenced from required .class files [2025-04-01 20:17:43] [build-stderr] ---------- [2025-04-01 20:17:43] [build-stderr] 1 problem (1 error)
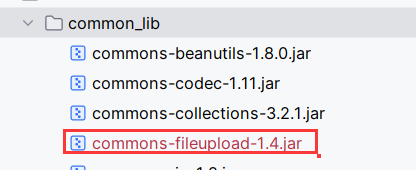
那就下载一个org.apache.commons.fileupload.FileItemFactory所在的jar包,加到common_lib下,其他同理
springboot项目在run.cmd里添加lib/spring_boot_lib
1 2 3 @echo off "D:\jdk-all\jdk_8u_381\bin\java.exe" -jar D:\PyCharm\Project-all\CodeQLpy\lib\ecj-4.6.1.jar -extdirs "D:\PyCharm\Project-all\CodeQLpy\out\decode\lib;lib/common_lib;lib/java8_lib;lib/spring_boot_lib;lib/tomcat_lib" -sourcepath D:\PyCharm\Project-all\CodeQLpy\out\decode\classes -encoding UTF-8 -8 -warn:none -proceedOnError -noExit @D:\PyCharm\Project-all\CodeQLpy\out\decode/file.txt
我运行的参数如下:
1 python CodeQLpy.py -t E:\CODE_COLLECT\Idea_java_ProTest\SSTIVuln\target\SSTIVuln-0.0.1-SNAPSHOT.jar -v 8 -c
我-t指定源代码,然后-j附加依赖jar总是分析不成功,不懂
但是最好不要这么分析,因为codeQL如果分析web项目的话,都是搜开发代码里的source点,而不会现场挖链子,如果需要分析链子,则直接甩依赖的jar包进去,而不是自己开发的项目进去。一般都是用来分析单组件。
tabby的话就会少很多麻烦,打包成fatJAR直接就能使用,因为不会经过反编译再编译,不会少一些依赖类,Jar包直接就能使用
总的来说,想要分析依赖都得经过一次fatJAR的打包,或者工具指定依赖目录
